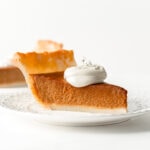
The Best Gluten-Free Pumpkin Pie Recipe (Dairy-Free Option)
The best Gluten-Free and Dairy-Free Pumpkin Pie recipe ever! It has just the right amount of sweetness and the perfect amount of pumpkin spice in every bite. The greatest Thanksgiving dessert this holiday season!
Servings 8 people
Calories 296kcal
Ingredients
Gluten-Free Pie Crust (with dairy)
Gluten-Free & Dairy-Free Pie Crust
- see full recipe in "recipe notes" below
Pumpkin Pie Filling
- 1 - 15 oz can pumpkin purée
- 3 large eggs, room temperature
- ¼ cup honey, (84 grams)
- ¼ cup maple syrup, (60 grams)
- ⅔ cup full-fat canned coconut milk, (142 grams) *see notes about straining*
- 1½ teaspoons vanilla extract
- 1 tablespoon pumpkin pie spice
- 1 teaspoon cinnamon
- ¼ teaspoon salt
Instructions
Pie Crust
- Make the crust. Follow the full instructions for a 9-inch pie crust. Roll a disk of homemade dough into a 12-inch circle, line a 9-inch pie pan, crimp the edges, and freeze the crust for 30 minutes. (See notes below for the dairy-free pie crust option).
- Par-bake. Preheat the oven to 425°F. Line the pie crust with non-stick aluminum foil and fill it with pie weights. Place the pie dish onto a lined baking sheet, and bake for 15 minutes. Remove the crust from the oven, and carefully lift out aluminum foil with pie weights. Place the foil and weights in a nearby bowl to cool.
- Apply egg wash. In a small bowl whisk together 1 egg and a splash of milk. Brush the edges and center of the pie crust with the egg wash for a golden crisp color. No need to dock the pie crust. Return the crust to the oven to bake for an additional 8-12 minutes, or until the bottom of the crust is pale, dry, crisp, and flakey. If the crust puffs up out of the oven, feel free to gently push it down with the back of a knife.
- Let the crust cool. Allow the pie crust to cool before adding the filling.
- Lower the oven temperature to 325°F. The crust will need to brown a bit further in the oven once the filling is added, but if there are any dark spots you can tent the edges with a few strips of foil folded in half lengthwise (which will protect the edges from getting too dark).
Pumpkin Pie Filling
- Combine the eggs and pumpkin purée. To a large mixing bowl or stand mixer with a whisk attachment, combine the room-temperature eggs and pumpkin. Whisk on medium speed for 30 seconds, or until combined.
- Add the remaining ingredients. Pour in the honey, maple syrup, vanilla extract, cinnamon, pumpkin pie spice, salt, and coconut milk. Continue to whisk until just combined, then turn off the mixer. Using a rubber spatula, scrape down the edges of the bowl and fold in any remaining spices
- Add the filling to the crust. Pour the filling into the pre-cooked pie crust. Gently tap the baking sheet on the counter to help remove and expose any bubbles in the filling. As the bubbles surface, you can pop them with a fork. This will help ensure a soothe surface. Place the baking sheet on the bottom rack of the oven and bake for 40-55 minutes, or until the filling is just set. Add a pie shield to the crust at about 20-25 minutes into the bake if it's catching too much color. (Every oven is different, so I recommend checking to see if your pie is fully cooked at the 35-minute mark). The filling should look slightly puffed around the edges and the center should jiggle slightly if you nudge the pan.
- Let the pie cool. Once the pie is fully cooked, turn off the oven and crack the door. Let the pie cool in the oven for 30 minutes, or until the oven is no longer warm. This will allow the pie to cool to room temperature slowly, avoiding any cracks in the custard.
- Cool on a wire rack. Once the oven has cooled, remove the pie from the oven and transfer it to a wire rack to continue cooling for 2 hours. You can serve the pie warm or refrigerate for an additional 2 hours or overnight to firm up.
Notes
Pro Tips!
- Room temperature ingredients. To ensure the eggs cook properly make sure all of the ingredients are at room temperature.
- Par-bake the pie crust. I recommend you par-bake your homemade pie crust for a crisp and flaky shell. No soggy bottom!
- Pie Sheild. I recommend adding a pie shield to the crust around 20-25 minutes into the baking. If the crust has some brown coloring prior to baking the filling, you can loosely tent some tin foil over those areas.
- Weigh all of your ingredients! I can't stress this enough, but make sure to weigh all of your ingredients on a food scale for complete accuracy.
- Avoid pie cracks. Bake the pie on the bottom rack at a low temperature of 325°F. Once the pie is fully baked, turn off the oven and crack the door. Let the pie sit in the oven for 30 minutes, and then transfer the pie to a wire rack to continue cooling for 2 hours. This will allow the pie to come to room temperature slowly, avoiding any cracks in the custard.
- Bake the pie on a baking sheet. To easily pull the pie in and out of the oven, bake both the crust and pie with filling on a baking sheet.
- Bake on the bottom rack. This will help the pie and pie crust to be baked more evenly and the filling will be less likely to crack.
- Clump-free coconut milk. It is normal for coconut milk to separate, and for the the cream to clump which affects the filling. To avoid this, shake the can vigorously before opening, then pour the can over a mesh strainer into a bowl, to help strain any coconut clumps. Additionally, make sure to measure the amount on a food scale for an accurate amount.
- Don't forget to lower the temperature! The pie crust is par-baked at 425°F but the the custard is baked at 325°F. Don't forget to lower the oven temperature prior to baking the filling.
- How do I know when my pumpkin pie is done baking? A fully baked pumpkin pie will have slightly puffed edges and the center should jiggle just slightly, similar to Jell-O if you nudge the pan. The internal temperature of the pumpkin pie should be at least 180°F at its coolest point.
-
- 1 ¼ cup (170 grams) gluten-free flour, (Bob Mills 1 to 1 Gluten-Free Baking Flour)
- ¼ teaspoon salt
- 1 tablespoon sugar, or (coconut sugar, to keep refined sugar-free)
- ¼ teaspoon salt
- 8 tablespoons (113 grams) of dairy-free butter, (Earth Balance sticks)
- 1 large egg
- 1-2 tablespoons ice cold water, (15-30 grams) if the dough is too dry
1. Chill the butter. Cube the butter, and place the cubes onto a small plate, in the freezer for 15 minutes.
2. Mix the dry ingredients. To a food processor add the gluten-free flour, sugar, and salt. Pulse or whisk together a few times to blend the mix.
3. Add the cold butter. Add the cubed butter to the flour mixture and toss to coat. Pulse a few times until you get chunks no bigger than the size of walnut halves. This will create flaky layers. You want the butter chunks no bigger than the size of walnuts. Anything larger you can quickly break apart with your hands but make sure to not handle the butter too much. Every piece of butter should be coated in flour.
4. Add the egg. Add the cold egg and pulse again until combined. The dough should start to hold together if you smash it together with your fingers. If the dough is still too crumbly add 1-2 tablespoons of ice-cold water, 1 tablespoon at a time, as needed. You want the dough to be slightly moistened, without visibly dry parts of flour. It should also not be overly wet or sticky.
5. Shape the dough. Using a spatula, spoon the mixture into a bowl. Smash it together with your hands to form a ball. Shape the ball of dough, then wrap the disk in plastic wrap and refrigerate for at least 45-60 minutes. If you refrigerate the dough longer than 1 hour, let the dough sit at room temperature for 15 minutes before rolling.
6. Roll the pie crust. Place a piece of parchment paper on your work surface and sprinkle with flour as well as the rolling pin. Roll the dough until it is large enough to fit your pie plate at ¼ inch thickness. Place the pie plate on top of the dough, upside down, and carefully flip the pie dish over. Remove the parchment paper and gently ease the dough into the bottom and sides of the pan. Trim any excess edges with scissors and shape the edges as desired.
7. Freeze the crust. Place in the freezer for 30 minutes to firm.
8. Parbake: Follow instructions for parbaking.
Nutrition
Serving: 1slice | Calories: 296kcal | Carbohydrates: 36g | Protein: 5g | Fat: 16g | Saturated Fat: 10g | Cholesterol: 113mg | Sodium: 162mg | Potassium: 184mg | Fiber: 3g | Sugar: 21g | Vitamin A: 8081IU | Vitamin C: 3mg | Calcium: 54mg | Iron: 2mg