Enjoy the amazing taste of gluten-free rice krispie treats, made with caramelized brown butter and loaded with gooey marshmallows.

Why You Will Love This Gluten-Free Rice Krispie Treats Recipe
These gluten-free rice krispie treats are not your average rice krispie treats. They are incredibly crisp, chewy, and flavorful, with caramel-like notes from the brown butter and loads of gooey marshmallows throughout. Here are some more reasons why you will love these crispy treats:
- A classic recipe with only five simple ingredients.
- An easy no-bake dessert you can make any time of the year.
- The brown butter gives these homemade rice krispie treats a rich caramel-like flavor that makes them unique and decadent.
Gluten-Free Rice Krispie Treat Ingredients

Ingredient Notes
- Gluten-Free Crispy Rice Cereal: There are many brands of gluten-free crisp rice cereal. Remember to always check the ingredient list first for any gluten-containing grain such as barley malt or malt syrup.
- Butter: Browning the butter creates caramelized flecks for a rich decadent caramel flavor.
- Marshmallows: Mini marshmallows give this recipe its gooey texture. Make sure your bag of marshmallows is fresh for best results.
- Vanilla Extract: Use a high-quality vanilla extract for the best flavor.
- Salt: Brings depth and enhances the flavor of the brown butter.
Find the printable recipe card with full instructions and measurements below.
What Rice Cereal Brands Are Gluten-Free?
Here are some of the brands that make certified gluten-free rice cereal, which are safe for those with celiac disease:
- One Degree Organic Foods (this is a brand we have used with good results).
- Wegmans
- Arrowhead Mills
- Erewhon
- Aldi
- Nature’s Path
- Tesco ( International )
How To Make Gluten-Free Rice Krispie Treats

Prepare your pan, cereal, and marshmallows. Grease and line a 9×13 inch baking pan with parchment paper and set it aside. Add the gluten-free crisp rice cereal to a large bowl. In a separate bowl, measure out the mini marshmallows and set aside 2 cups for later in the recipe.
- Brown the butter. In a large pot, melt the butter over medium heat. Within 2-3 minutes the butter will start to foam. Whisk constantly until the butter begins to turn a golden brown color and omit a nutty aroma. Then turn the heat down to low.
- Melt the marshmallows. Add all but the reserved 2 cups of marshmallows to the pot. Stir until the marshmallows are melted, it's ok if there are a few clumps. Stir in the vanilla and salt and remove the pot from the heat.
- Add the cereal and extra marshmallows. Add the cereal, give the pot a quick stir, and then fold in the remaining 2 cups of mini marshmallows, you'll want to work quickly.
- Transfer to pan. Once combined, carefully transfer the marshmallow mixture into the prepared pan. The marshmallows will be very sticky, but an easy way to spread out the mixture is by using a rubber spatula. Press the mixture down into the pan with the spatula but avoid packing. Let cool for at least 30 minutes before slicing.
Storage
- Storage: Rice krispie treats will stay soft and delicious for 2-3 days. You can wrap each square individually in plastic wrap and store them in an airtight container. A trick to soften them quickly is to microwave 1 treat for 5-8 seconds.
- Freezing: Wrap individual treats in plastic wrap then place them in a ziplock freezer-safe bag. You can freeze them for up to 6 weeks. Thaw on the counter before eating.
Rice Krispie Variations
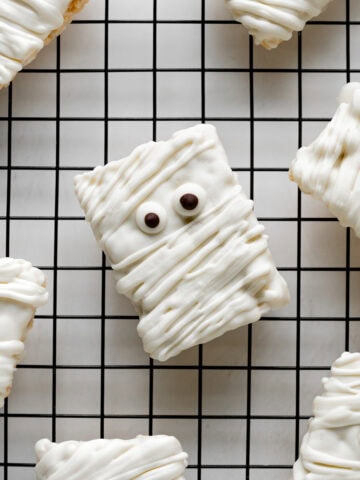
- Holiday Themed- Try these Halloween mummy rice krispie treats.
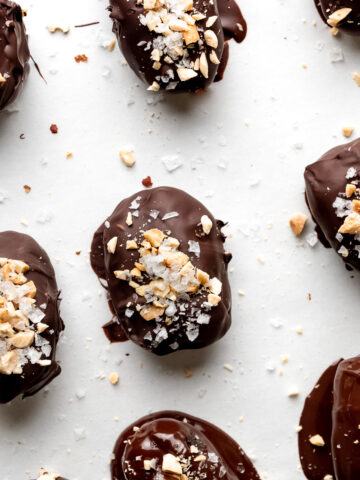
- Chocolate Dipped - Dip the rice krispie squares in melted dark chocolate, milk chocolate, or white chocolate.
- Add Dried Fruit - In a blender or food processor, blend freeze-dried strawberries, raspberries, or blueberries to form a powder. Add the powder to the melted marshmallows for fruit-flavored rice krispie treats.
- Add Nut Butter - Stir half a cup of peanut butter or almond butter into the melted marshmallows before adding the cereal.
- Vegan Rice Krispies Treats - Use dairy-free butter and your favorite brand of vegan marshmallows. Just note that dairy-free butter does not "brown." Instead, just melt the butter.

FAQ
Kellogg’s Rice Krispies Cereal is made with malt flavor, which comes from barley and may contain gluten. For those with food allergies, make sure to look for gluten-containing ingredients on the back of the ingredient label when purchasing your rice cereal. Gluten-free products are often certified and labeled on the box but always double-check.
Packing the marshmallow cereal mixture creates hard, dense treats. Use a rubber spatula to gently push down the treats, forming them into the pan, but do not compact them.
More No-Bake Treats You'll Love


I hope you love this gluten-free rice krispie treats recipe as much as I do! If you make it, I’d love to hear how it turned out in the comment box below. Your review will help other readers in the community.
Recipe

Gluten-Free Rice Krispie Treats
Ingredients
- 8 tablespoons unsalted butter
- 16 ounces mini marshmallows, divided
- 1 teaspoon vanilla extract
- ¼ teaspoon salt
- 6 ½ cups (240g) gluten-free crisp rice cereal, (One Degree Sprouted Brown Rice Crisps)
Instructions
- Prepare your pan, cereal, and marshmallows. Grease and line a 9×13 inch baking pan with parchment paper and set aside. Add the gluten-free crisp rice cereal to a large bowl. In a separate bowl, measure out the mini marshmallows and set aside 2 cups for later in the recipe.
- Brown the butter. In a large pot, melt the butter over medium heat. Within 2-3 minutes the butter will start to foam. Whisk constantly until the butter begins to turn a golden brown color and omit a nutty aroma. Then turn the heat down to low.
- Melt the marshmallows. Add all but the reserved 2 cups of marshmallows to the pot. Stir until the marshmallows are melted, it's ok if there are a few clumps. Stir in the vanilla and salt and remove the pot from the heat.
- Add the cereal and extra marshmallows. Add the cereal, give the pot a quick stir, and then fold in the remaining 2 cups of mini marshmallows, you'll want to work quickly.
- Transfer to pan. Once combined, carefully transfer the marshmallow mixture into the prepared pan. The marshmallows will be very sticky, but an easy way to spread out the mixture is by using a rubber spatula. Press the mixture down into the pan with the spatula but avoid packing. Let cool for at least 30 minutes before slicing.
Notes
- Avoid hard rice krispie treats: Use a rubber spatula to gently push down the treats, forming them into the pan, but do not compact them.
- Weigh the rice cereal! Make sure to weigh the rice cereal on a food scale in grams, not cups. One Degree Sprouted Brown Rice Crisps weigh more than most rice cereals; therefore, if you go with a different brand, the measurements may be off.


Micalene says
You’re the BEST!
Rebecca Taig says
Aww right back at you!