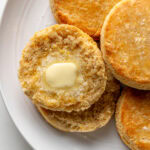
Cornmeal Biscuits with Buttermilk (Gluten-Free)
These cornmeal biscuits are soft, fluffy, and rich with butter, made with a touch of garlic and tangy buttermilk. You'll love the dual texture: a gentle cornmeal crunch and a tender, melt-in-your-mouth interior. They are absolutely perfect alongside your favorite soups and chili.
Servings 5 (Depending on biscuit cutter size)
Calories 413kcal
Ingredients
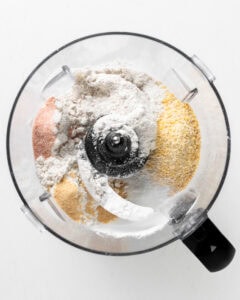
- 2 cups (272) gluten-free flour (Bob's Red Mill Gluten Free 1 to 1 Baking Flour)
- 6 tablespoons (57g) medium grind cornmeal
- 1 tablespoon baking powder
- ½ teaspoon baking soda
- 1 teaspoon salt
- 1 teaspoon garlic powder
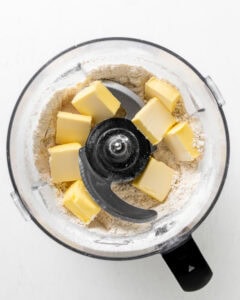
- 8 tablespoons (113g) frozen butter, see notes
- 1 cup (240ml) buttermilk
- 1 tablespoon (21g) honey
Instructions
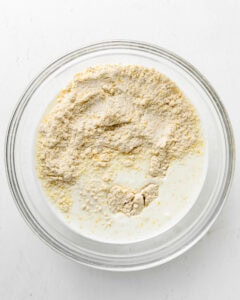
- Combine Dry Ingredients (Food Processor). Place the gluten-free flour, cornmeal, baking powder, baking soda, garlic powder, and salt into the food processor bowl. Pulse the mixture until all ingredients are just combined and evenly distributed.Combine Dry Ingredients (Bowl Method)If you don't have a food processor, whisk the gluten-free flour, cornmeal, baking powder, baking soda, garlic powder, and salt together in a large mixing bowl. Whisk for about 30 seconds to ensure the leavening agents and spices are evenly distributed throughout the flour mixture.
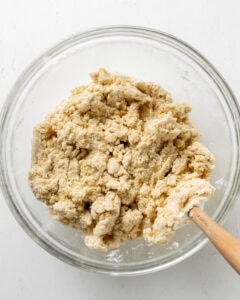
- Add the cold butter (Food Processor). Pulse the cubed frozen butter into the flour until coarse crumbs form. Transfer the mixture to a large mixing bowl.Add the cold butter (Bowl Method). Add the cubed, cold butter to the dry mixture. Using a pastry blender, two knives, or your fingertips, quickly cut the butter into the flour until the mixture resembles coarse crumbs. Work quickly to keep the butter as cold as possible.
- Add the wet ingredients. Pour the buttermilk over the flour mixture and add the honey.
- Bring the dough together. Mix gently with a rubber spatula until the dough is just combined.
- Roll out the dough. Turn the dough out onto a lightly floured surface. With floured hands, knead the dough a few times to bring it all together. Gently pat the dough into a 1-inch-thick rectangle, approximately 7x6 inches.
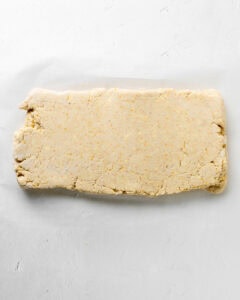
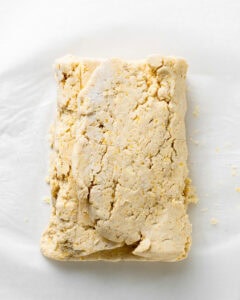
- Laminate the dough. To create tender, flaky layers, take one side of the dough and fold it into the center, then fold the opposite side on top of the first, just like folding a letter for an envelope. Turn the dough horizontally (a quarter turn), and gently flatten it back into a rectangle. Repeat this folding process two more times. On the last fold, turn the dough horizontally, then flatten the dough into a ¾-inch-thick rectangle, ready for cutting.
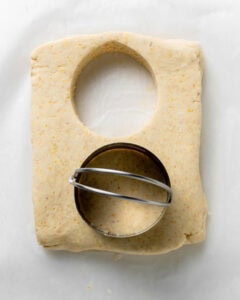
- Cut the biscuits. Using a 2½ to 3-inch round biscuit cutter, press straight down into the dough and pull straight up. It is essential not to twist the cutter, as this will crimp the edges of the dough and prevent your biscuits from rising properly. Be sure to clean and re-flour the cutter between each cut.Gather any dough scraps and gently re-roll them into another rectangle, maintaining a thickness of about ¾ to 1 inch. Continue cutting biscuits until all the dough is used. Depending on the size of your cutter, you should yield between 5 and 8 biscuits.
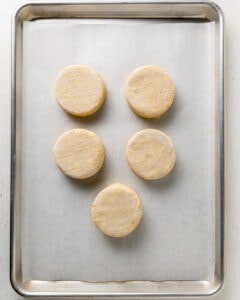
- Freeze the biscuits. Place the biscuits on a parchment-lined baking sheet, and put them into the freezer for 20 minutes. While the biscuits are chilling, preheat the oven to 425°F.
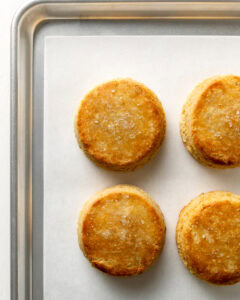
- Bake the biscuits. Once ready to bake, remove the biscuits directly from the freezer. Brush the tops with extra buttermilk, taking care to avoid letting any drip down the sides, which can hinder a clean rise. Bake for 18 to 20 minutes (in my oven, 18 minutes is perfect), or until they are golden brown and the internal temperature reaches 190°F. Immediately upon removing them from the oven, brush the hot tops generously with melted butter and sprinkle with flaky sea salt. Serve them warm and enjoy!
Notes
Frozen Butter:
For the flakiest layers, prepare your butter ahead of time:
- Grate or Dice: Cut the stick of cold butter into cubes, or use a box grater to quickly grate it.
- Freeze: Place the prepared butter in the freezer for a minimum of 20 minutes. This ensures the butter is frozen solid, which is the key to creating those buttery, flaky layers!
Nutrition
Calories: 413kcal | Carbohydrates: 51g | Protein: 8g | Fat: 22g | Saturated Fat: 13g | Polyunsaturated Fat: 1g | Monounsaturated Fat: 6g | Trans Fat: 1g | Cholesterol: 53mg | Sodium: 772mg | Potassium: 361mg | Fiber: 6g | Sugar: 8g | Vitamin A: 639IU | Vitamin C: 0.03mg | Calcium: 198mg | Iron: 2mg