Gluten Free Scones Recipe
This classic gluten-free scone recipe creates a rich, tender crumb with a crisp, golden exterior. They're perfect on their own or with your favorite mix-ins, making them a delightful treat to enjoy with a warm cup of tea or morning coffee.
Servings 8
Calories 301kcal
Ingredients
Gluten Free Scones
- 2 cups (272g) gluten-free flour (Bob's Red Mill 1 to 1 Baking Flour)
- ¼ cup (50g) granulated sugar, plus additional for sprinkling on top
- 1 tablespoon baking powder
- ½ teaspoon salt
- 8 tablespoons (113g) frozen butter, grated or diced (see notes)
- ½ cup (120g) sour cream
- 4 tablespoons (60ml) heavy cream
- 1 large egg
Egg Wash
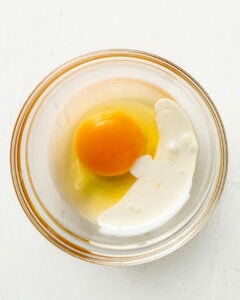
- 1 large egg
- ½ tablespoon (7ml) heavy cream
Instructions
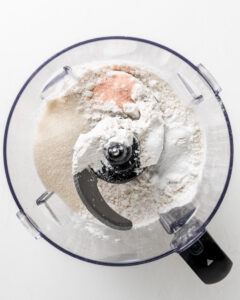
- Combine the dry ingredients. In a large bowl, whisk together the gluten-free flour, sugar, baking powder, and salt until well-mixed. If you're using a food processor, add the dry ingredients to the bowl and pulse a few times to combine.
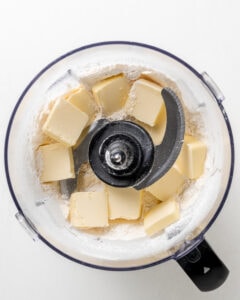
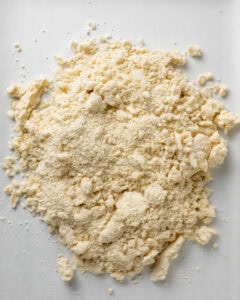
- Add the frozen butter. Next, grate the frozen butter on a box grater and add it to the flour mixture. Using a pastry blender or two forks, quickly work the butter in until the mixture resembles coarse crumbs. For a food processor, add diced frozen butter to the bowl and pulse until coarse crumbs form.
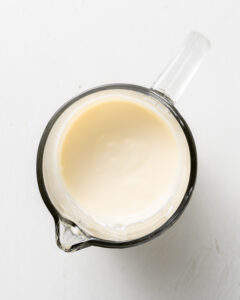
- Whisk the wet ingredients. In a separate bowl, whisk the sour cream, one large egg, and heavy cream until well combined.
- Create a well in the center of the flour mixture. If you used a food processor, pour the contents into a large bowl before creating the well. Pour the sour cream mixture into the well.
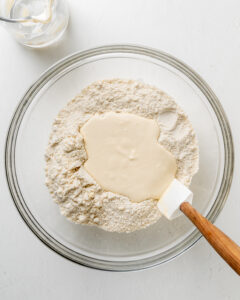
- Stir the ingredients. Using a rubber spatula, gently stir just until a shaggy, crumbly dough forms. Don't worry if it looks very loose or has some dry bits at the bottom of the bowl; as long as the dough holds together when you pinch it, you're on the right track. It's important not to overmix.
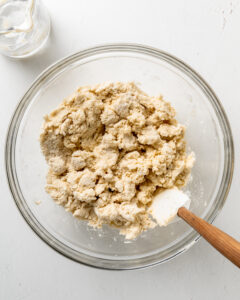
- Bring the dough together. Lightly flour your work surface and turn the dough out onto it. With floured hands, gently knead the dough just until it holds together. Be careful not to overwork it, as this can make the scones tough.
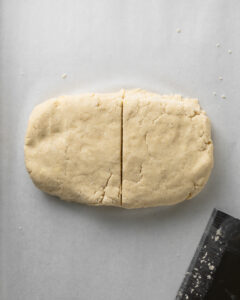
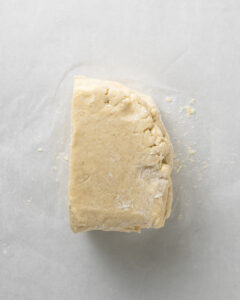
- Shape the dough. Lightly pat the dough into a 7x5-inch rectangle. Cut the dough in half vertically with a knife or bench scraper. I prefer using a bench scraper, as it makes it easy to cut and lift the dough without warming it up too much.
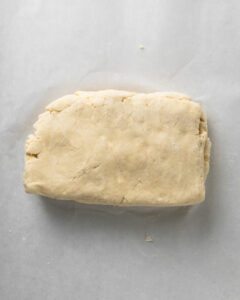
- Create flaky layers by laminating the dough. Stack the pieces on top of each other. Turn the dough 90 degrees and press down gently to flatten it back into a 7x5-inch rectangle. If the dough starts to feel sticky at any point, add a light dusting of flour to your hands or work surface.
- Repeat lamination. Repeat this entire process of cutting, stacking, and rotating for a total of four repetitions.
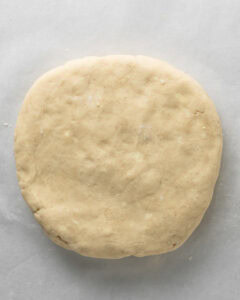
- Shape and chill the dough. With your hands, gently pat the dough into a 7-inch disk, aiming for a thickness of about 1 inch. Be sure not to go thinner than ¾ inch, or your scones may turn out flat. Once shaped, wrap the disk tightly in plastic wrap and place it in the refrigerator to chill for at least 30 minutes. Chilling the dough is essential, as it helps the gluten-free flour absorb the liquid, resulting in a less gritty texture in the final scones.
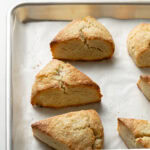
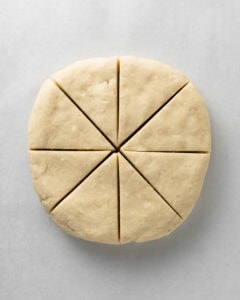
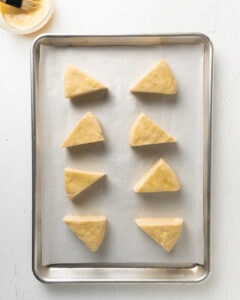
- Cut the scones. After chilling, remove the dough from the refrigerator. With a sharp knife or pastry cutter, slice the disk into 8 triangular wedges. For the best rise and a clean cut, wipe the knife clean after each slice and press straight down through the dough—don't twist it. Freeze the scones and preheat the oven. Arrange the cut scone wedges on a parchment-lined baking sheet, leaving a few inches of space between each one. Place the baking sheet in the freezer for 30 minutes to chill. While the scones are chilling, preheat your oven to 400°F. This final chill is crucial for a flaky, high-rising scone because it ensures the butter is very cold before baking.
- Prepare the egg wash. Once the scones have chilled for 30 minutes, remove them from the freezer. In a separate, small bowl, whisk together a large egg and a splash of heavy cream. This egg wash will help the scones achieve a beautiful, glossy golden brown top as they bake.
- Add the egg wash and sugar. Using a pastry brush, brush the tops of the scones with the egg wash. Be careful to avoid drips on the sides, as this can prevent a good rise. Then, sprinkle the tops with granulated sugar.
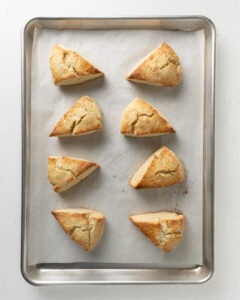
- Now it's time to bake! Place the baking sheet in the preheated oven and bake for 20 minutes, or until the scones are a beautiful golden brown. To test for doneness, you can insert a toothpick into the center—it should come out clean—or use an instant-read thermometer, which should read at least 200°F. Once baked, remove the scones from the oven and transfer them to a wire rack. Let them cool for at least 30 minutes before serving.
Notes
Frozen Butter:
To achieve the flakiest texture, place the butter in the freezer for at least 20 minutes before you begin. Once frozen, you can either grate it into the flour mixture or dice it and pulse it in a food processor.
Nutrition
Calories: 301kcal | Carbohydrates: 30g | Protein: 5g | Fat: 19g | Saturated Fat: 11g | Polyunsaturated Fat: 1g | Monounsaturated Fat: 5g | Trans Fat: 0.5g | Cholesterol: 95mg | Sodium: 261mg | Potassium: 198mg | Fiber: 3g | Sugar: 8g | Vitamin A: 631IU | Vitamin C: 0.2mg | Calcium: 116mg | Iron: 1mg