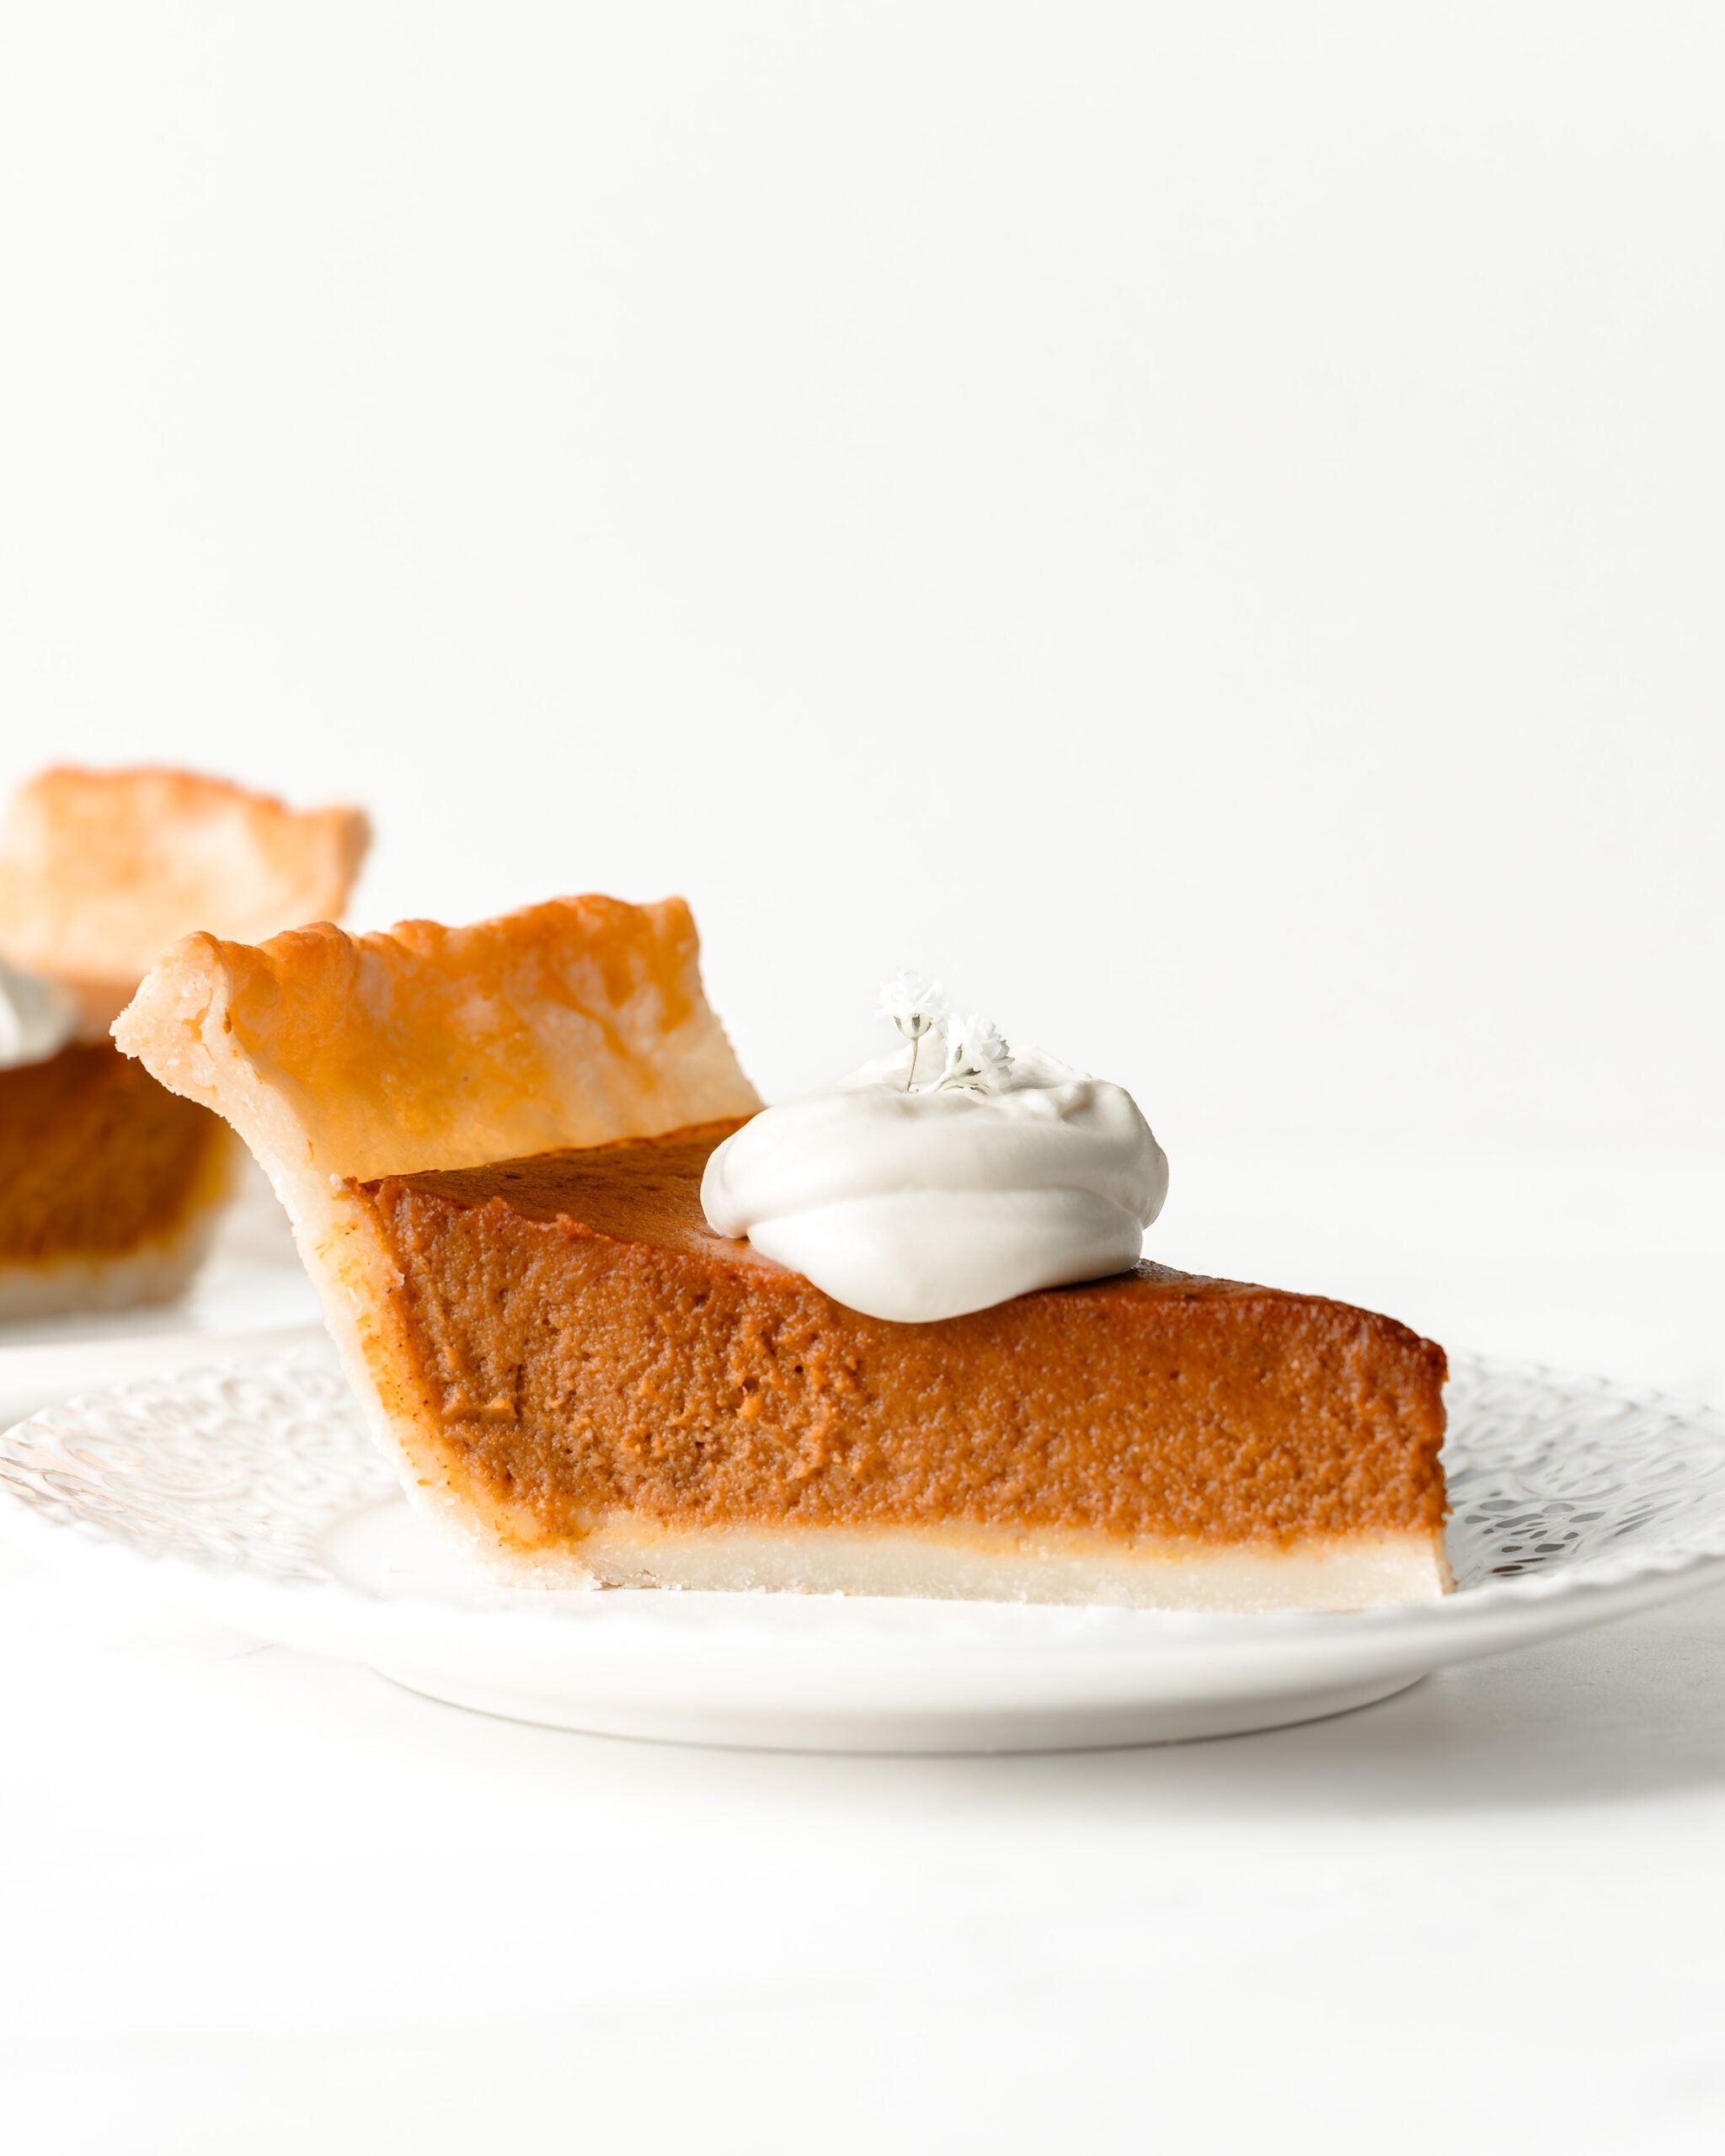
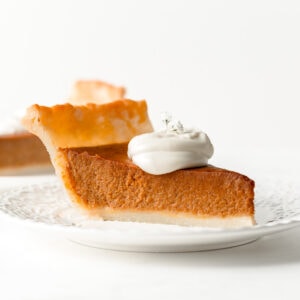
The best Gluten-Free and Dairy-Free Pumpkin Pie recipe ever! It has just the right amount of sweetness and the perfect amount of pumpkin spice in every bite. The greatest Thanksgiving dessert this holiday season!
Pumpkin pie has always been one of my favorite Thanksgiving pies growing up, and every year I look forward to making this recipe. In fact, one could argue that it's not quite Thanksgiving without it. This gluten-free pumpkin pie recipe is incredible, paired with the most delicious golden buttery flaky crust! (For those who need a dairy-free crust option, see the recipe card below).
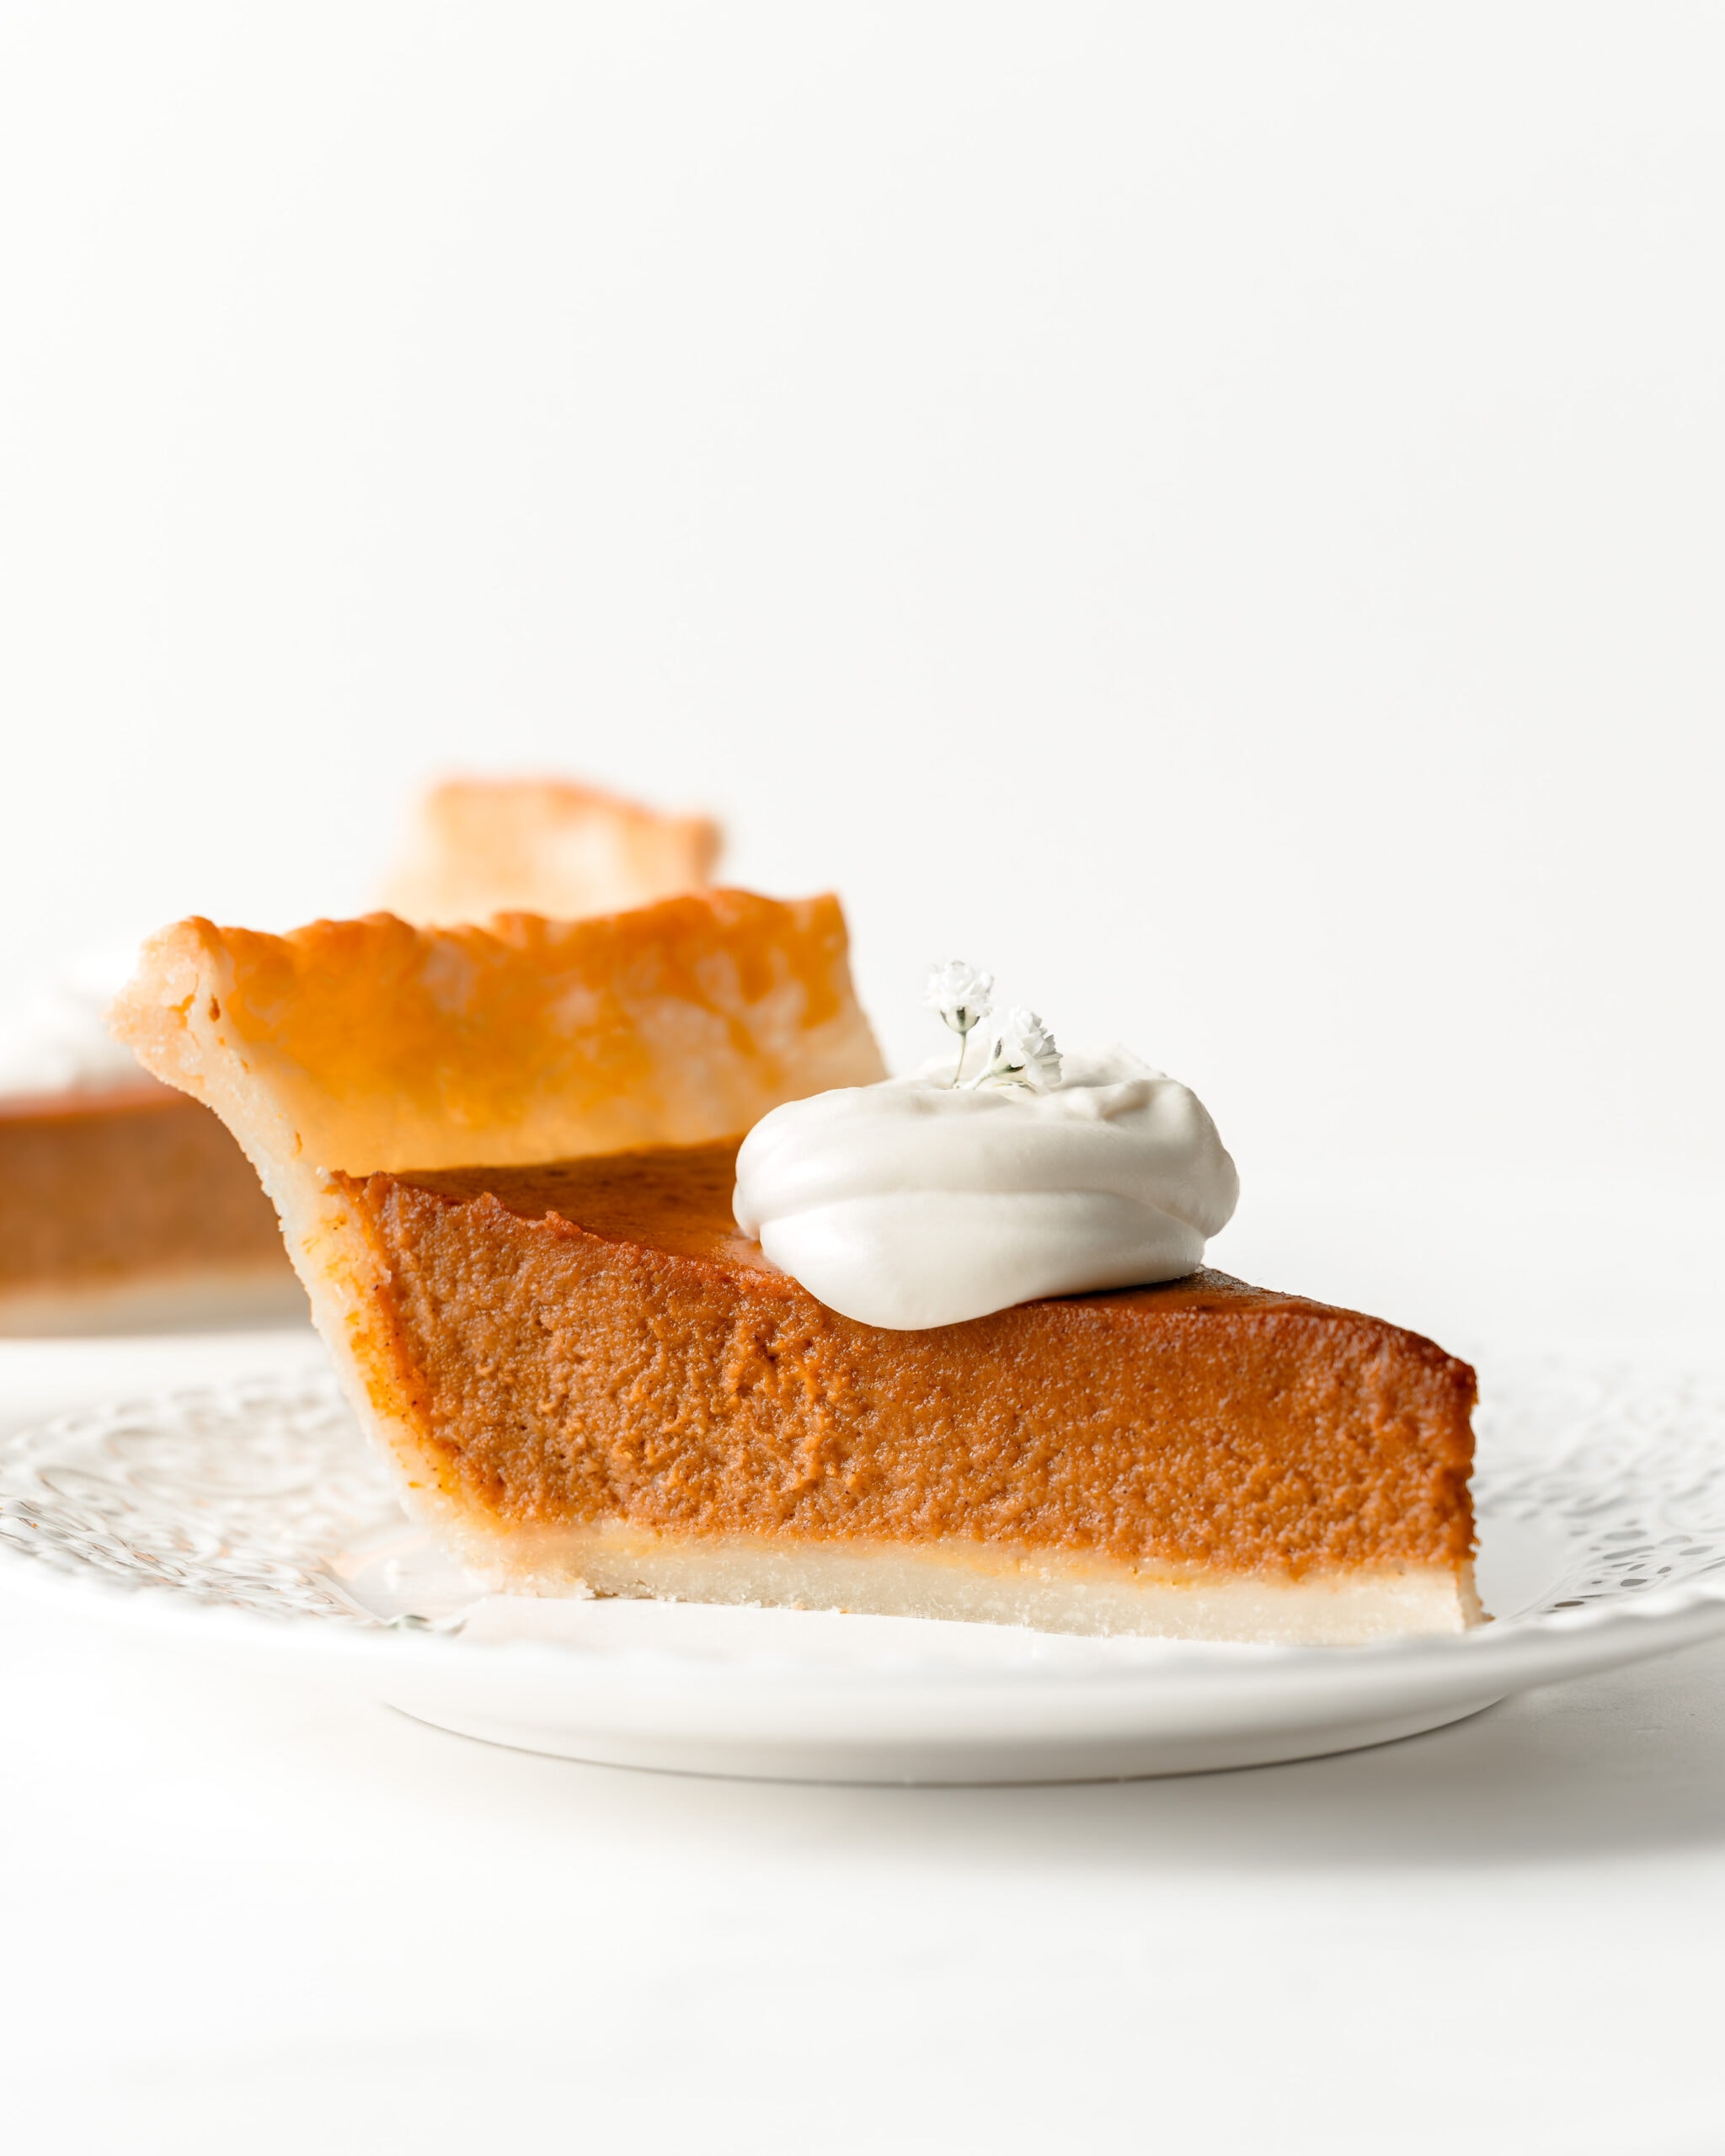
The custard filling is sweetened with honey and maple syrup, no refined sugar, with just the right amount of cinnamon, and pumpkin pie spice. To keep this pie filling dairy-free, we use full-fat coconut milk instead of evaporated milk. Finish with a dollop of homemade whipped cream or coconut cream, and you have the perfect holiday dessert.
If you love this gluten-free pumpkin pie recipe, check out our Gluten-Free Pecan Pie - No corn syrup, Gluten-Free Pumpkin Bundt Cake, The Best Gluten-Free Pumpkin Bread, and Healthy Apple Crisp.
Jump to:
Why you will love this recipe
Incredible flavor: You don't want just a good pumpkin pie, you want the BEST pumpkin pie. What makes this pie the best? It has just the right amount of cozy fall flavors with a hint of vanilla and a creamy silky smooth texture.
Baked to perfection and no cracks! Over the last year, I adjusted the recipe to strive for perfection. It took me 12 trials to find the perfect bake time. Our goal was to achieve a perfectly crisp flaky pie crust and a smooth custard filling with no cracks. The key is to par-bake the crust first at a high temperature of 425°F, which ensures no soggy bottom. Then you want to bake the pie filling low and slow at 325°F which sets the custard beautifully.
Allergen-friendly: This pumpkin pie filling has no gluten, no refined sugar, and no dairy.
Two buttery crust options: The original crust recipe was gluten-free and dairy-free made in a food processor. We have updated the pie crust recipe to a new gluten-free crust that does include dairy but kept the dairy-free crust option in the notes section of the recipe card. I highly recommend trying the new recipe if you can tolerate dairy. While the dairy-free pie crust is still a great recipe for those who need a dairy-free option, this new recipe is ultra buttery, flakey, and overall a more workable crust.
Ingredients
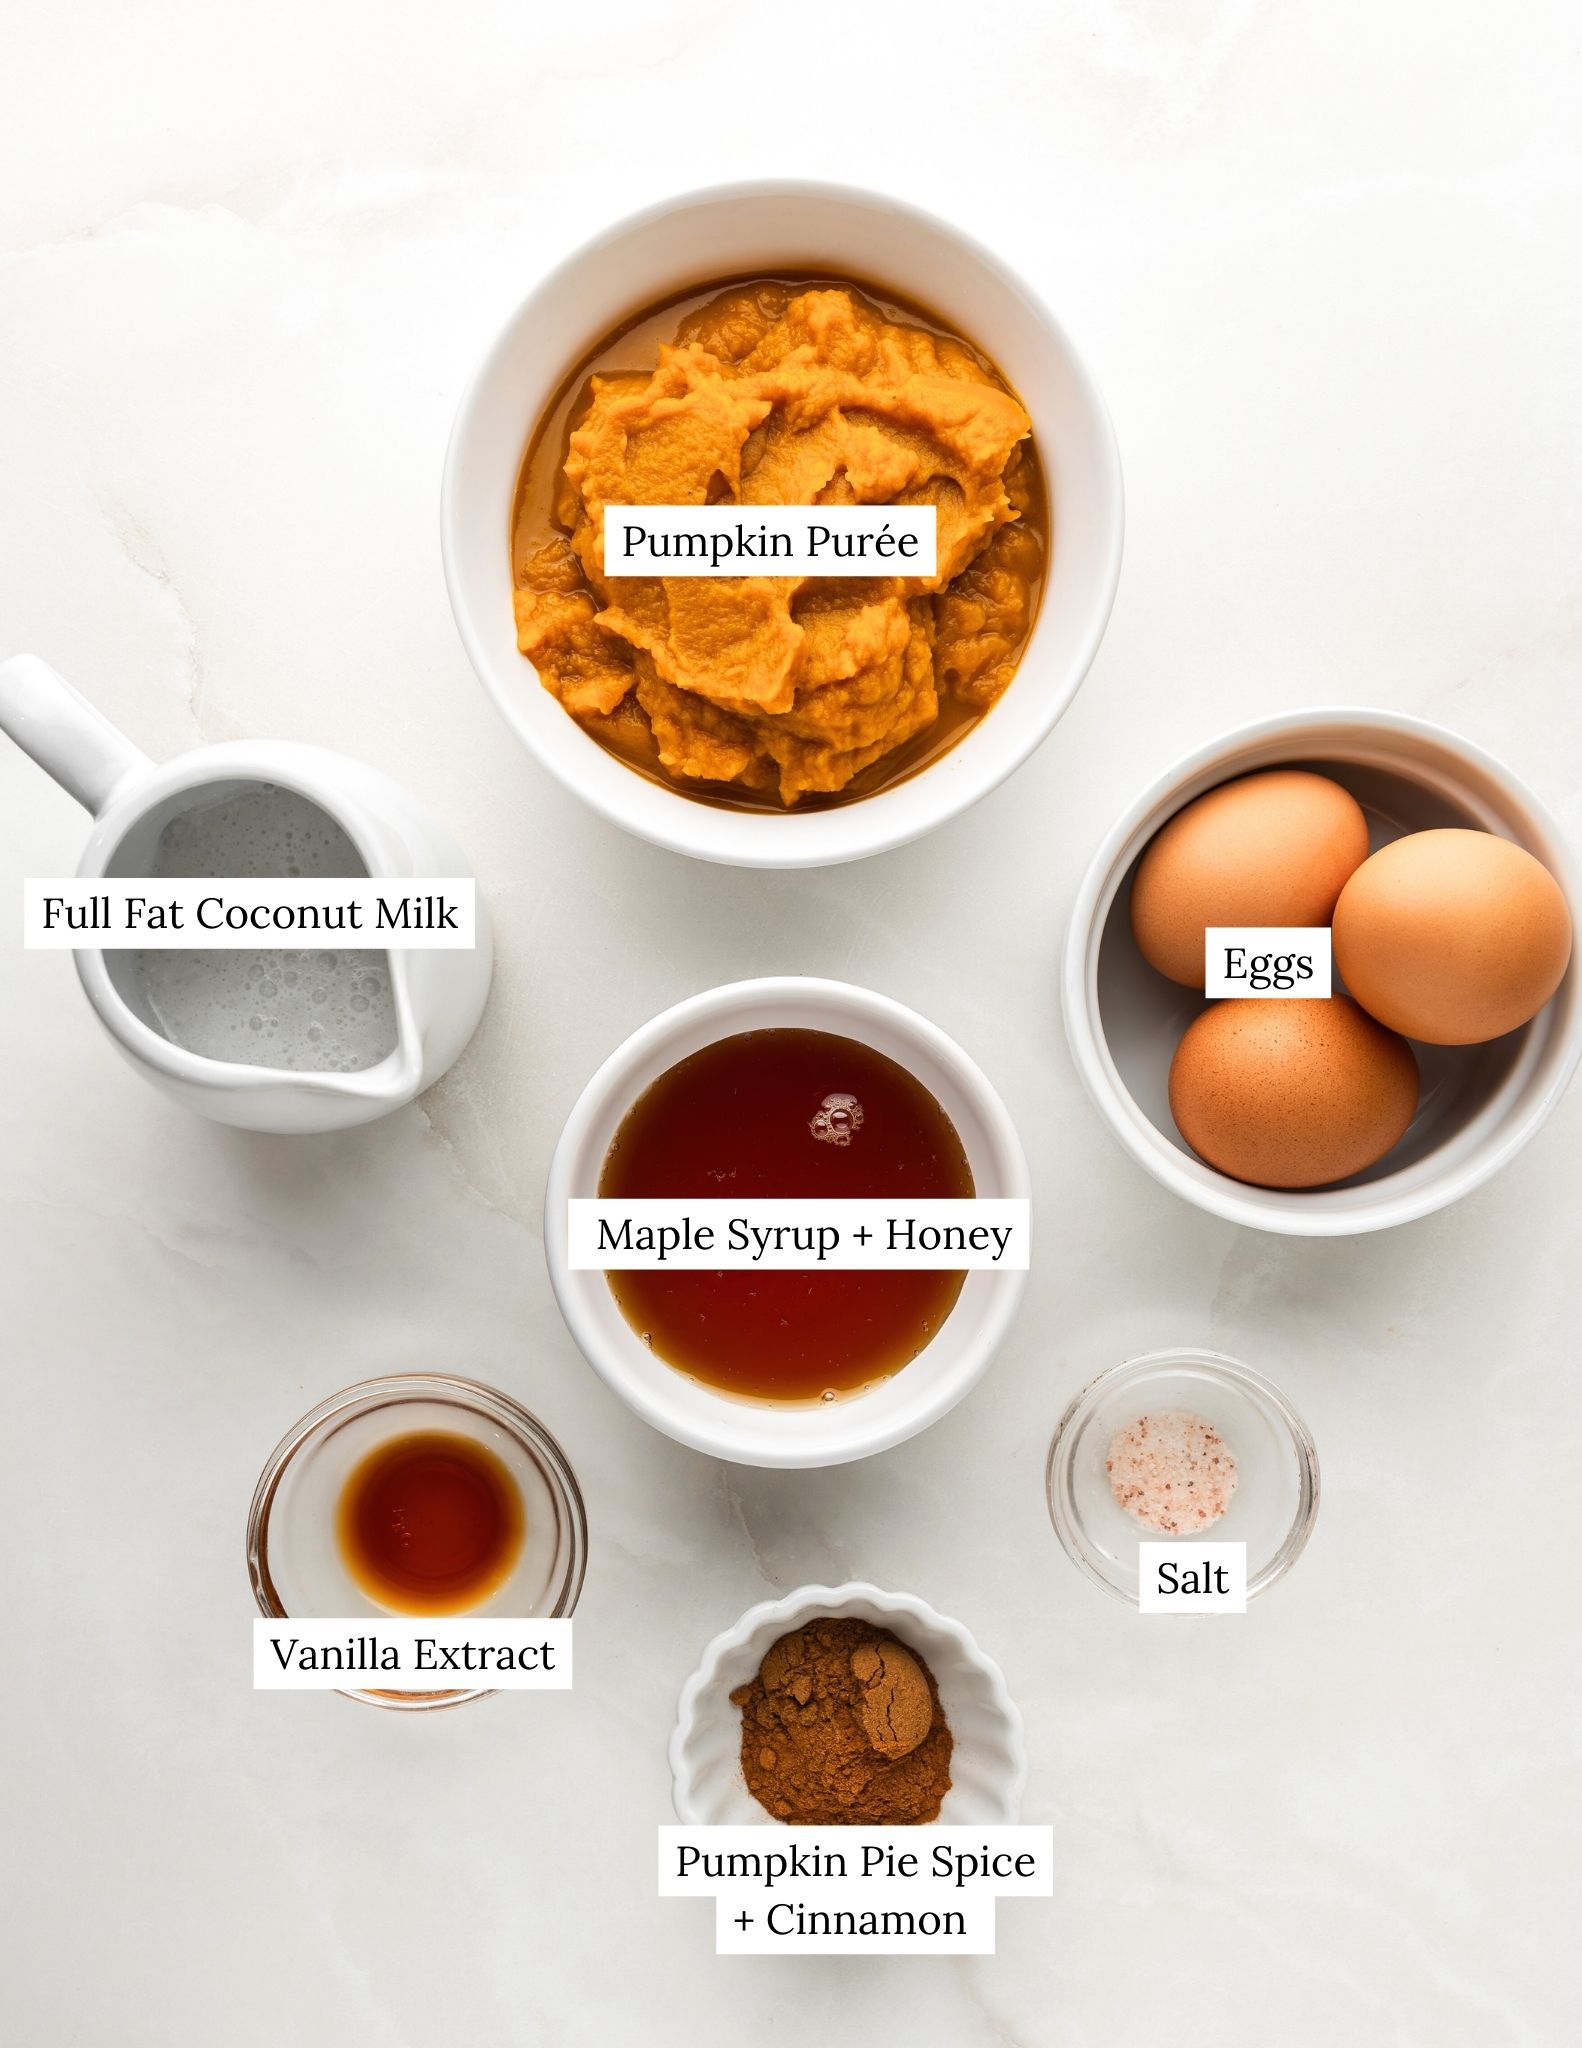
- Pumpkin: Make sure to look for a 15 oz can of pumpkin purée (not pumpkin pie filling)! One thing to note is that not all canned pumpkin is the same. Different brands may be lighter in color and more watery in their consistency, which means it will take longer for the custard to bake. Recently I've switched to using the Sprouts brand pumpkin, which I find is thicker and richer in color and taste. Farmers Market Organic Pumpkin Puree is still a great option but contains more water.
- Eggs: The eggs should be at room temperature to ensure they incorporate into your pie filling evenly. Make sure to not over-whisk to avoid any cracks or bubbles on the top of the pie.
- Honey + Maple Syrup: To keep this pie refined sugar-free we use a combination of high-quality honey and pure dark maple syrup, which gives this pie a rich robust flavor.
- Vanilla Extract: A high-quality real vanilla extract adds an extra touch of flavor.
- Coconut Milk: Full-fat canned coconut milk is an excellent dairy-free option that gives this custard a creamy silky texture, and you can't taste the coconut flavor. If you are still not a fan of coconut milk, try almond milk instead. For those who can tolerate dairy and prefer another option, I recommend using heavy cream. (See my tip below to help ensure your coconut milk is silky smooth).
- Pumpkin Pie Spice + Cinnamon: An entire tablespoon of pumpkin pie spice and a teaspoon of ground cinnamon is the perfect amount of spice, giving this pie a cozy warm fall-like flavor. Every brand has a different flavor profile. In my opinion, Simply Organic spices have the best flavor.
- Salt: A pinch of salt helps balance the flavors and brings forward the sweetness.
Instructions
Par-bake the gluten-free pie crust

- Make the crust. Roll a disk of pie dough into a 12-inch circle, line a 9-inch pie dish, crimp the edges, and freeze the crust for 30 minutes.
- Par-bake. Preheat the oven to 425°F. Line the pie crust with non-stick aluminum foil and fill it with pie weights. Place the pie plate on a lined baking sheet, and bake for 15 minutes. Carefully lift and remove the aluminum foil with pie weights and place them in a nearby bowl to cool.
- Apply egg wash. In a small bowl whisk together 1 egg and a splash of milk. Brush the edges and center of the pie crust with the egg wash for a golden crisp color. No need to dock the pie crust for this recipe. Return the crust to the oven to bake for an additional 8-12 minutes, or until the bottom of the crust is pale, dry, crisp, and flaky. If the crust puffs up out of the oven, feel free to gently push it down with the back of a knife.
- Let the crust cool. Lower the oven temperature to 325°F. The crust will need to brown a bit further in the oven once the filling is added, but if there are any dark spots you can tent the edges with a few strips of foil folded in half lengthwise (which will protect the edges from getting too dark).
Make the pumpkin pie filling
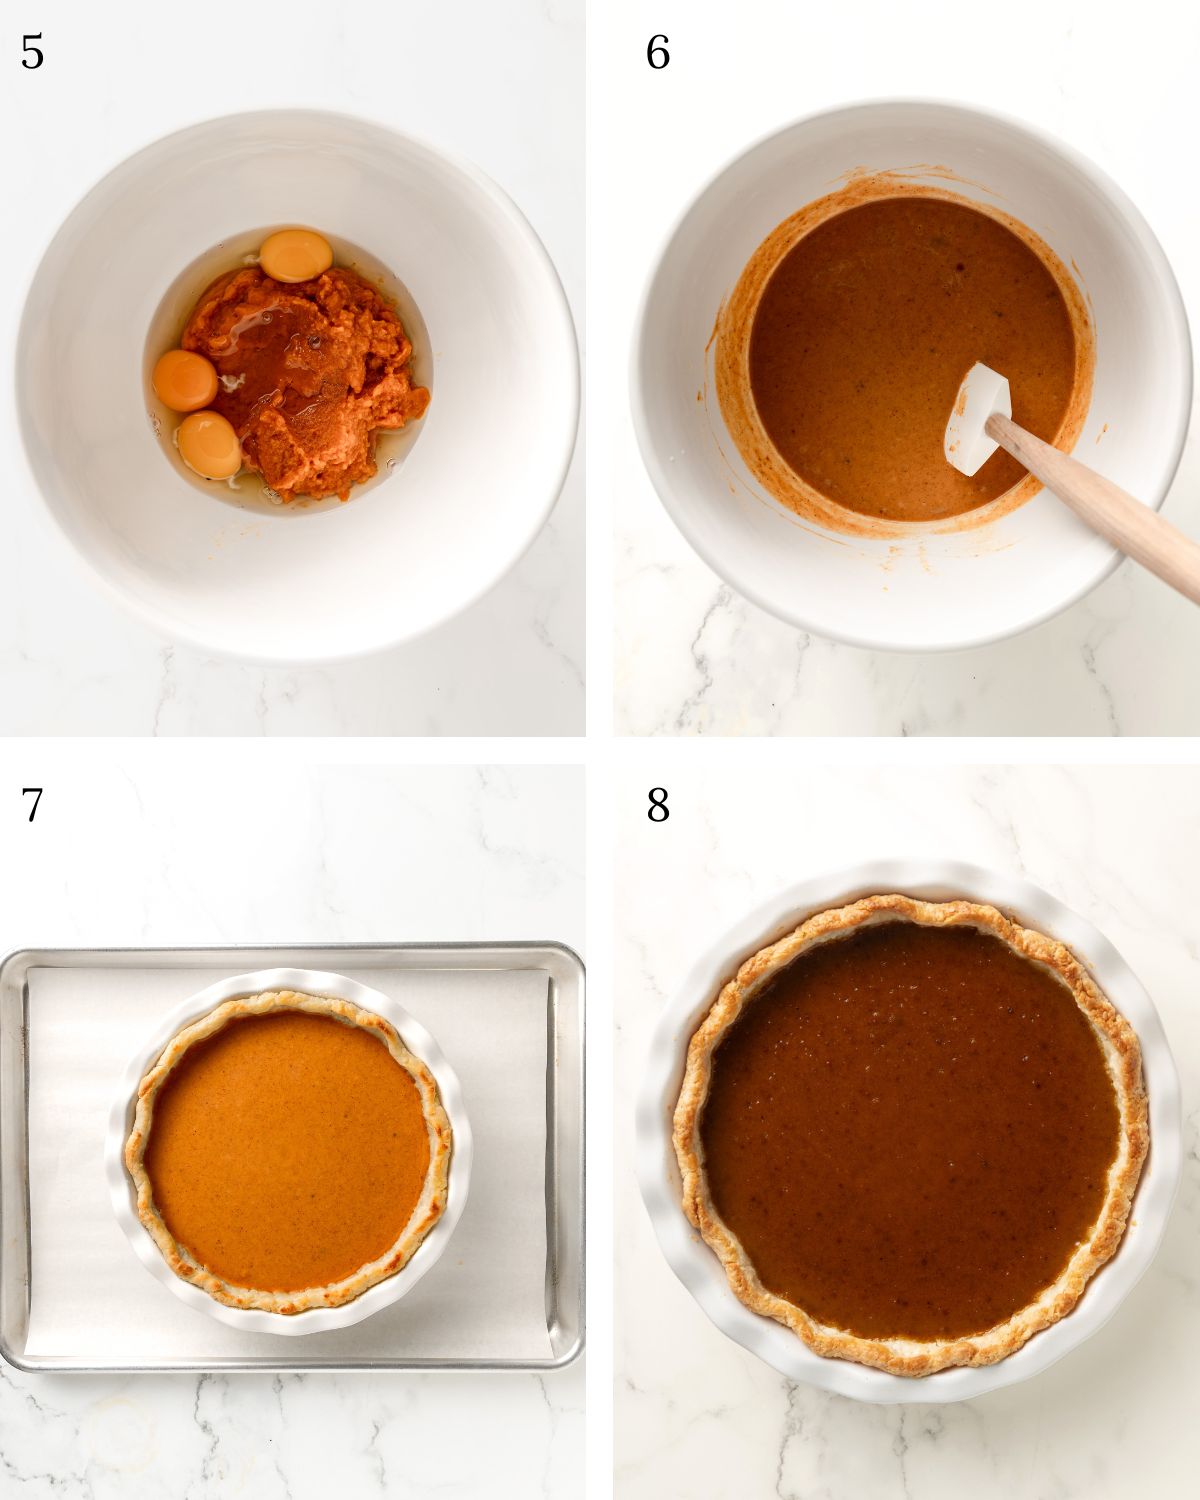
- Combine the eggs and pumpkin purée. To a large mixing bowl or stand mixer with a whisk attachment, combine the room-temperature eggs and pumpkin. Whisk on medium speed for 30 seconds, or until combined.
- Add the remaining ingredients. Pour in the honey, maple syrup, vanilla extract, cinnamon, pumpkin pie spice, salt, and coconut milk. Continue to whisk until just combined, then turn off the mixer. Using a rubber spatula, scrape down the edges of the bowl and fold in any remaining spices.
- Add the filling to the crust. Pour the pumpkin filling into the cooled pie crust. Gently tap the baking sheet on the counter to help remove and expose any bubbles in the filling. As the bubbles surface, you can pop them with a fork. This will help ensure a soothe surface. Place the baking sheet on the bottom rack of the oven and bake for 40-55 minutes, or until the filling is just set. Add a pie shield to the crust about 20-25 minutes into the bake if it's catching too much color. (Every oven is different, so I recommend checking to see if your pie is fully cooked at the 35-minute mark). The filling should look slightly puffed around the edges and the center should jiggle slightly if you nudge the pan.
- Let the pie cool. Once the pie is fully cooked, turn off the oven and crack the door. Let the pie cool in the oven for 30 minutes, or until the oven is no longer warm. This will allow the pie to cool to room temperature slowly, avoiding any cracks in the custard. Remove the pie from the oven and transfer it to a wire rack to continue cooling for 2 hours. You can serve the pie warm or refrigerate for an additional 2 hours or overnight to firm up.
Pumpkin pie substitutions and variations
- Dairy-Free: This recipe is made with a delicious dairy-free pumpkin pie filling. The dairy-free pie crust recipe can be found in the notes section of the recipe card.
- Dairy-Tolerant: If you tolerate dairy and do not want to use coconut milk, you can use heavy cream in the custard filling as a substitute.
- Vegan: For a vegan pumpkin pie, substitute the eggs with 3 tablespoons of cornstarch and add more maple syrup in place of the honey.
- Pumpkin Pie Spice: You can use store-bought or homemade pumpkin pie spice to tweak the flavors to your liking. Adding a pinch of cardamom would be delightful.
Pro baking tips
- Room temperature ingredients. To ensure the eggs cook properly make sure all of the ingredients are at room temperature.
- Par-bake the pie crust. I recommend you par-bake your homemade pie crust for a crisp and flaky shell. No soggy bottom!
- Pie Sheild. I recommend adding a pie shield to the crust around 20-25 minutes into the baking. If the crust has some brown coloring prior to baking the filling, you can loosely tent some tin foil over those areas.
- Weigh all of your ingredients! I can't stress this enough, but make sure to weigh all of your ingredients on a food scale for complete accuracy.
- Avoid pie cracks. Bake the pie on the bottom rack at a low temperature of 325°F. Once the pie is fully baked, turn off the oven and crack the door. Let the pie sit in the oven for 30 minutes, and then transfer the pie to a wire rack to continue cooling for 2 hours. This will allow the pie to come to room temperature slowly, avoiding any cracks in the custard.
- Bake the pie on a baking sheet. To easily pull the pie in and out of the oven, bake both the crust and pie with filling on a baking sheet.
- Bake on the bottom rack. This will help the pie and pie crust to be baked more evenly and the filling will be less likely to crack.
- Clump-free coconut milk. It is normal for coconut milk to separate, and for the the cream to clump which affects the filling. To avoid this, shake the can vigorously before opening, then pour the can over a mesh strainer into a bowl, to help strain any coconut clumps. Additionally, make sure to measure the amount on a food scale for an accurate amount.
- Don't forget to lower the temperature! The pie crust is par-baked at 425°F but the the custard is baked at 325°F. Don't forget to lower the oven temperature prior to baking the filling.
- How do I know when my pumpkin pie is done baking? A fully baked pumpkin pie will have slightly puffed edges and the center should jiggle just slightly, similar to Jell-O if you nudge the pan. The internal temperature of the pumpkin pie should be at least 180°F at its coolest point.
Storing and serving
To store: Pumpkin pie will need to completely cool at room temperature, for at least 2-3 hours before the refrigerating. Once cooled, it can be wrapped in aluminum foil and stored in the refrigerator for up to 4 days.
To serve: You can serve the pie warm, once cooled, or straight from the refrigerator.
FAQ
Pumpkin pie cracks are a result of overbaking, baking the pie too close to the oven's top heating element, baking at too high of a temperature, or quick temperature changes when cooling. To avoid this, bake the custard on the bottom rack at a low temperature of 325°F. Once the pie is fully cooked, turn off the oven and crack the door. Allow the pie to cool in the oven for about 30 minutes, and then continue cooling on a wire rack for 2 hours.
A fully baked pumpkin pie will have slightly puffed edges and the center should jiggle just slightly, similar to Jell-O if you nudge the pan. The internal temperature of the pumpkin pie should be at least 180°F at its coolest point.
Yes, Libby's brand is gluten-free. When selecting any brand of canned pumpkin, you want the only ingredient to be pure pumpkin.
This is a result of overbaking your pie. If the custard loses too much water, it will pull away from the crust as it sets.
Some people do not like the taste of coconut but rest assured you can not taste the coconut flavor in this pie filling.
You can serve this pie with dairy-free whipped cream, dairy-free ice cream, or on its own.
Recipe
The Best Gluten-Free Pumpkin Pie Recipe (Dairy-Free Option)
Ingredients
Gluten-Free Pie Crust (with dairy)
Gluten-Free & Dairy-Free Pie Crust
- see full recipe in "recipe notes" below
Pumpkin Pie Filling
- 1 - 15 oz can pumpkin purée
- 3 large eggs, room temperature
- ¼ cup honey, (84 grams)
- ¼ cup maple syrup, (60 grams)
- ⅔ cup full-fat canned coconut milk, (142 grams) *see notes about straining*
- 1½ teaspoons vanilla extract
- 1 tablespoon pumpkin pie spice
- 1 teaspoon cinnamon
- ¼ teaspoon salt
Instructions
Pie Crust
- Make the crust. Follow the full instructions for a 9-inch pie crust. Roll a disk of homemade dough into a 12-inch circle, line a 9-inch pie pan, crimp the edges, and freeze the crust for 30 minutes. (See notes below for the dairy-free pie crust option).
- Par-bake. Preheat the oven to 425°F. Line the pie crust with crumpled parchment paper and fill the center with pie weights. Place the pie dish onto a lined baking sheet, and bake for 15 minutes. Remove the crust from the oven, and carefully lift the parchment paper with pie weights out of the crust and to a nearby bowl to cool.
- Apply egg wash. In a small bowl whisk together 1 egg and a splash of milk. Brush the edges and center of the pie crust with the egg wash for a golden crisp color. No need to dock the pie crust. Return the crust to the oven to bake for an additional 8-10 minutes, or until the bottom of the crust is pale, dry, crisp, and flaky.
- Lower the oven temperature to 325°F. The crust will need to brown a bit further in the oven once the filling is added, but if there are any dark spots you can tent the edges with a few strips of foil folded in half lengthwise (which will protect the edges from getting too dark).
Pumpkin Pie Filling
- Combine the eggs and pumpkin purée. To a large mixing bowl or stand mixer with a whisk attachment, combine the room-temperature eggs and pumpkin. Whisk on medium speed for 30 seconds, or until combined.
- Add the remaining ingredients. Pour in the honey, maple syrup, vanilla extract, cinnamon, pumpkin pie spice, salt, and coconut milk. Continue to whisk until just combined, then turn off the mixer. Using a rubber spatula, scrape down the edges of the bowl and fold in any remaining spices.
- Add the filling to the crust. Pour the filling into the par-baked pie crust. Gently tap the baking sheet on the counter to help remove and expose any bubbles in the filling. As the bubbles surface, you can pop them with a fork. Place the baking sheet on the bottom rack of the oven and bake for 40-55 minutes, or until the filling is just set. Add a pie shield to the crust at about 20-25 minutes into the bake if it's catching too much color. (Every oven is different, so I recommend checking to see if your pie is fully cooked at the 35-minute mark). The filling should look slightly puffed around the edges and the center should jiggle slightly if you nudge the pan.
- Let the pie cool. Once the pie is fully cooked, turn off the oven and crack the door. Let the pie cool in the oven for 30 minutes, or until the oven is no longer warm. This will allow the pie to cool to room temperature slowly, avoiding any cracks in the custard.
- Cool on a wire rack. Once the oven has cooled, remove the pie and transfer it to a wire rack to continue cooling for 2 hours. You can serve the pie warm or refrigerate for an additional 2 hours or overnight to firm up.
Notes
-
- 1 ¼ cup (170 grams) gluten-free flour, (Bob Mills 1 to 1 Gluten-Free Baking Flour)
- 1 tablespoon sugar, or (coconut sugar, to keep refined sugar-free)
- ¼ teaspoon salt
- 8 tablespoons (113 grams) of dairy-free butter, (Earth Balance sticks)
- 1 large egg
- 1-2 tablespoons ice cold water, (15-30 grams) if the dough is too dry


Alayah says
Hello, very interesting to see both honey and maple syrup. May I ask why? How does it taste different from all honey or all maple, or does it?
Rebecca Taig says
The combination of both flavors yields the best taste in my opinion. Both honey and maple syrup have more complex flavor profiles than granulated sugar, and while combined, adds layers of richness and warmth to the pie.
Olive says
Hello. Has anyone tried ghee in place of the Earth Balance sticks gf butter? Thanks in advance!
Rebecca Taig says
Hi Olive,
You can use ghee instead of the Earth Balance sticks. 🙂
Karen G says
Hi Rebecca,
I forgot to ask you, can I make this today and refrigerate it until Thanksgiving?
Happy holiday to you and yours.
Karen
Rebecca Taig says
Absolutely! You can make the pumpkin pie today and it will be ready to go on Thanksgiving day. 🙂
Karen G. says
Hi Rebecca,
Can I use a gluten free frozen pie crust? Do I need to keep it in the oven after baking it?
Thanks
Rebecca Taig says
Hi Karen,
You can use a frozen gluten-free pie crust, just make sure to watch the bake time (the pie may cook sooner) as it will need to be adjusted. Follow the instructions for the frozen pie crust then bake the pie accordingly.
Keeping the pie in the oven allows the custard to come to room temperature slowly but is not necessarily required. Most pumpkin pies crack when they have been overbaked, or are cooled too quickly, going from a hot oven straight to the counter.
I hope you and you family have a wonderful holiday!
Elizabeth Amend says
Hi Rebecca,
I am planning on making your pumpkin pie for thanksgiving, but could only find canned coconut milk with 11 grams of fat. (It does not say full-fat.) Maybe I should keep shopping at other stores? There are such good reviews from your recipe and I want it to come out perfect! Thank you, Elizabeth
Rebecca Taig says
Hi Elizabeth!
That can of coconut milk will work great. 🙂 I mention this in the recipe, but if the coconut milk come out clumpy make sure to whisk and then strain and excess lumps, prior to adding to the filling and it will be perfectly smooth.
Have a wonderful holiday and happy baking!
Joanne K says
Looking forward to making this for Thanksgiving - is the full fat coconut milk sweetened or unsweetened? Thank you for such a great recipe, too!
Rebecca Taig says
Hi Joanne,
The full-fat canned coconut milk is unsweetened. 🙂
Wishing you a wonderful holiday.
Randi W says
I was just about to make your gluten free pie crust and noticed it has 1/4 teaspoon salt listed twice. Is that a typo and should it be a 1/4 tsp of a different ingredient?
Rebecca Taig says
Hi Randi!
Yes, thank you for catching that. In the gluten-free dairy-free pie crust recipe there is only 1/4 teaspoon of salt, it shouldn't have been listed twice.
If you can tolerate dairy, I do have another pie crust option listed with a link in the recipe card. Otherwise the gluten-free dairy-free pie crust in the "notes section" of the recipe card works great too.
Happy holidays!
Cindy Kennedy says
May I ask why you pre-bake the crust?
Rebecca Taig says
Hi Cindy!
Great question, par-baking, or blind baking, a pie crust before adding the filling is important for pumpkin pie because it ensures a flaky, crisp bottom crust (Not a soggy bottom to quote Paul Hollywood) and that the overall the crust browns fully.
Cindy says
Thanks for your quick reply…I have never pre baked a crust for pumpkin pie but will try it!
Nanette Littlestone says
Hi Rebecca,
I haven't made a pie in years and am looking forward to trying this recipe. It sounds absolutely marvelous. I had a question about greasing the pie dish. Since I'm dairy free, I plan on using coconut oil instead of butter for the crust. Would I use coconut oil to grease the pie dish?
Rebecca Taig says
Hi Nanette!
I am actually reshooting this recipe as we speak. 🙂
It depends on the pie dish, ceramic and glass pie dishes usually do not require greasing as the butter (or in this case oil) in the crust will help release the shell from the pan.
You can however use coconut oil lightly, and the will guarantee no sticking.
I have a new crust update that includes dairy, but I will also keep this dairy-free version mentioned in the post. If using coconut oil you'll want to make sure it's solid and not liquid.
I hope that helps, and happy baking!
Jill says
I’m gonna make this and can’t wait. So silly question but when you turn off oven you keep it in oven with door propped but pie is in oven still? How long does it usually take for an oven or pie to reach room temp??
Rebecca Taig says
Hi Jill,
Once the oven is completely cooled, remove the pie, and set it on cooling rack for at least 2 hours or until the pie dish no longer feels warm to touch.
You can then place the pie in the refrigerator to fully set. The reason for cooling the pie so slowly is to avoid any cracks. A sudden change in temperature will cause a crack in the middle of the custard.
Donna says
Can I bake this pie without using a crust?
Rebecca Taig says
Hi Donna!
That's a great question, I have not baked this recipe without the crust but you could totally try it.
Maybe adding the filling to small ramekins and baking them like a cheesecake, in a water bath could work too.
Let me know how it goes.
Becca
Diana says
I'm trying you recipe tonight. Can't wait!
What do you do with the chunks from the canned coconut milk?
Rebecca Taig says
I'm making it right now too!
You can pour the can into a bowl and whisk out some of the lumps, I've also used a mesh strainer.
If there are some lumps in the finished product, it will not alter the taste.
Happy Holidays!
Kailyn says
I’m thinking about making your recipe, and i was wondering if i could swap out the honey for more maple syrup or something else (if something else, what would you recommend?). I’m making this pie for someone who can’t have any honey or refined sugars.
Thank you!
Rebecca Taig says
Hi Kailyn,
You can use all maple syrup instead of honey and the pie will be delicious!
Happy Holidays!
Becca
Alexandria says
My husband and I were trying for YEARS to get the perfect gluten free crust recipe AND dairy free pumpkin pie filling. We had it for our wedding day and love it for our birthdays. This is hands down the BEST, simplest, flavorful pumpkin pie we have ever made. Only change I did was 1/2 tsp of cinnamon and 1/2 tsp allspice instead because my husband prefers allspice over cinnamon so it was a compromise. Anyway, we are keeping this recipe for years to come we love it that much. 💜
Rebecca Taig says
Hi Alexandria!
Wow, first of all, thank you for the amazing review. I love how you incorporated the pumpkin pie into so many special occasions.
I look forward to serving many more recipes to come.
Wishing you and your husband all the best!
Becca
Alexandria says
Awww thank you!! No problem!! I actually have a question with holidays coming up. Is it possible to prep it and freeze then bake it on Thanksgiving or do I have to make it all day of?? Thanks!!
Rebecca Taig says
Hi Alexandria!
I have not tried freezing this pumpkin pie before, but here are some troubleshooting steps for success:
How to Freeze Pumpkin Pie:
1. Cool the pie completely on a wire rack at room temperature.
2. Tightly wrap the pie in a few layers of plastic wrap and then an additional two layers of aluminum foil. We want to avoid freezer burn.
3. Optional, label the pie with the date and place the pie in the freezer on a level shelf until solid. Custard pies should not be frozen longer than 4 weeks.
4. Remove the aluminum and thaw 24 hours in advance before serving in the refrigerator.
Another option is to make the pie crust in advance and keep it in the freezer, that way all you have to whip up is the filling.
You could make the pie two days prior and just store it in the refrigerator until the day of.
I hope that helps!
Wishing you great baking success.