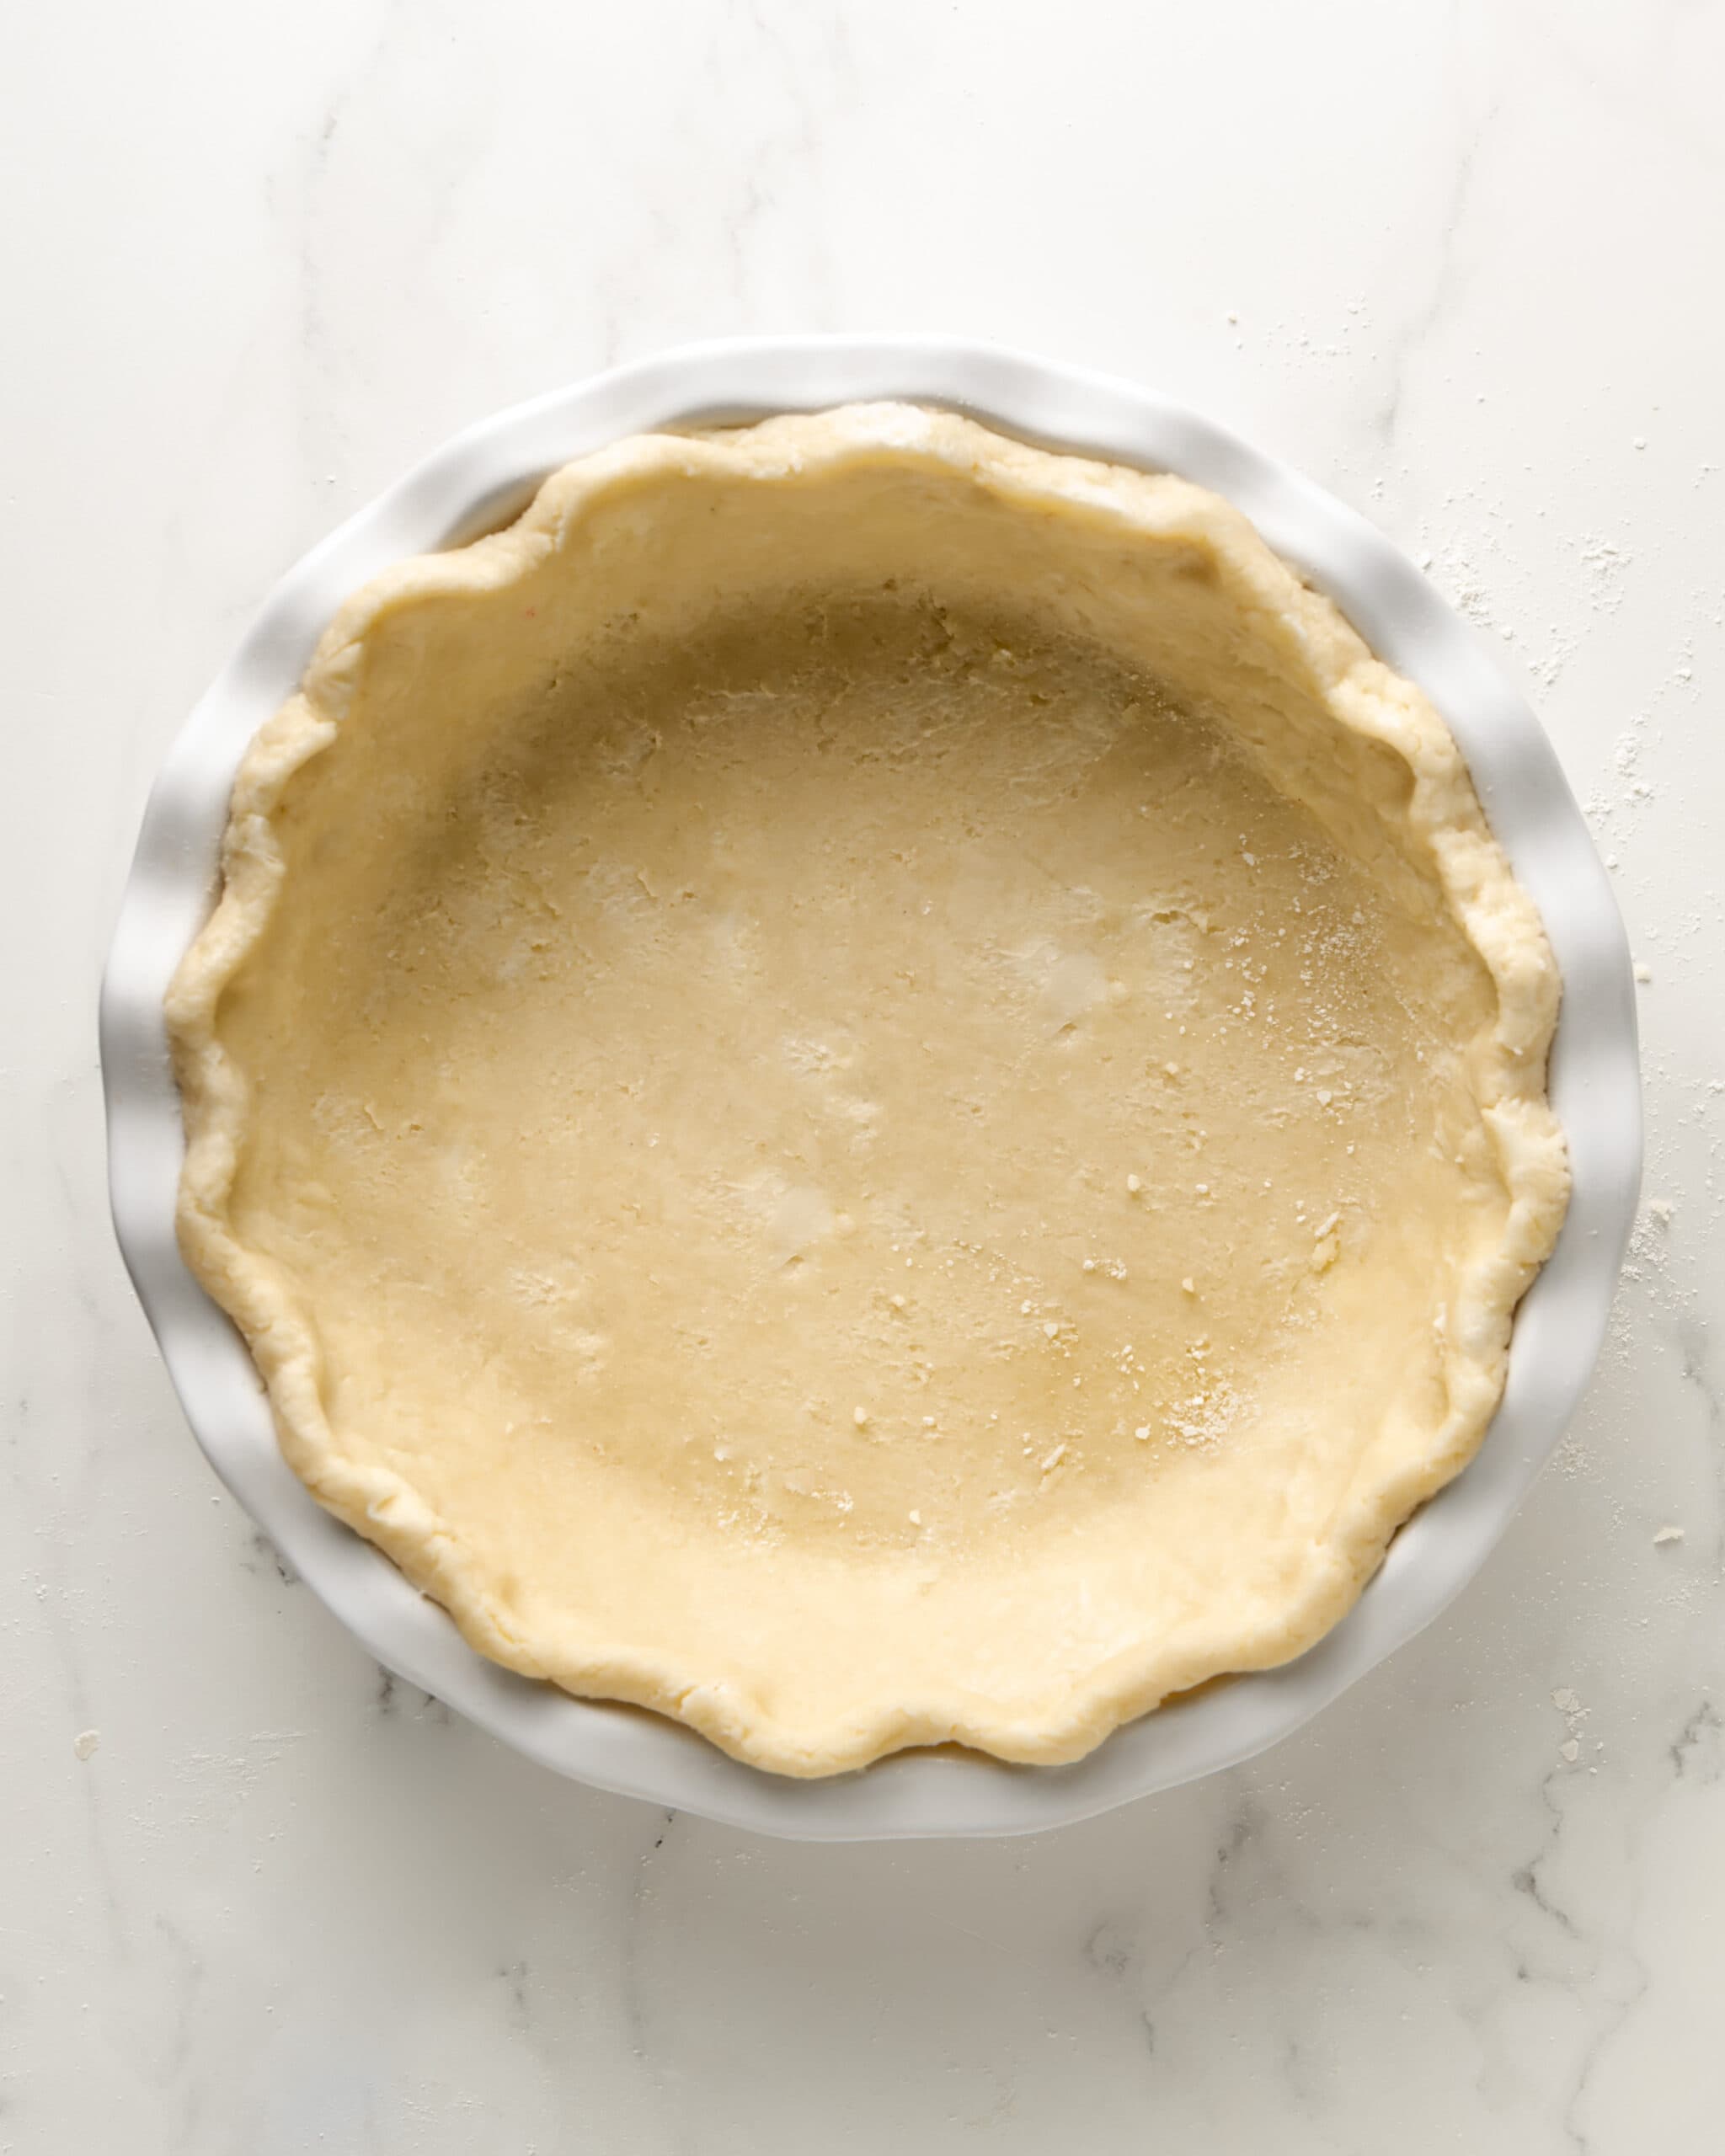
This easy homemade gluten-free pie crust recipe is ultra flaky with a classically rich, buttery flavor. In this post, I share my tips and tricks for making the perfect gluten-free pie crust, which can be used for both savory pies and sweet pies.
Why this recipe works
Making a gluten-free pie crust can be a bit intimidating but I'm here to share all my tips and tricks for getting the perfect pie crust. After testing several brands of gluten-free flour, I found that Cup 4 Cup flour had the best pie crust flavor and texture. It was so much easier to work with compared to any other gluten-free flour, which tends to crumble. My go-to flour for baked goods will continue to be Bob's Red Mill 1 to 1 gluten-free baking flour, but for pie crust, Cup 4 Cup multi-purpose gluten-free flour, hands down.
In this article, I'll walk you through making the dough step-by-step while sharing helpful tips, like using a food scale, to ensure the best results.
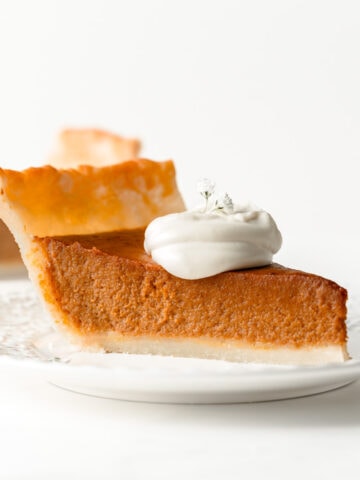
Recipes to make using this crust recipe include my Gluten-Free Pumpkin Pie, Gluten-Free Pecan Pie, Gluten-Free Sweet Potato Pie, or as the topping for my Chicken Pot Pie recipe, instead using biscuits.
Jump to:
Key factors
Selecting the right flour. We talked about how reliable Cup 4 Cup multi-purpose gluten-free flour is when making this pie crust recipe, as not all flour blends are created equally. If you have a dairy allergy then this blend will not work for you, and I suggest trying Bob's Red Mill 1 to 1 gluten-free flour or King Arthur gluten-free flour.
Cold ingredients. Aside from having the right flour to work with, another key factor in making pie crust is having very cold ingredients to work with to prevent the butter from melting.
Having the right ratios. It's important to have the proper amount of fat, liquid, and flour ratios, which is why I recommend weighing everything on a food scale, including the ice water.
Ingredients
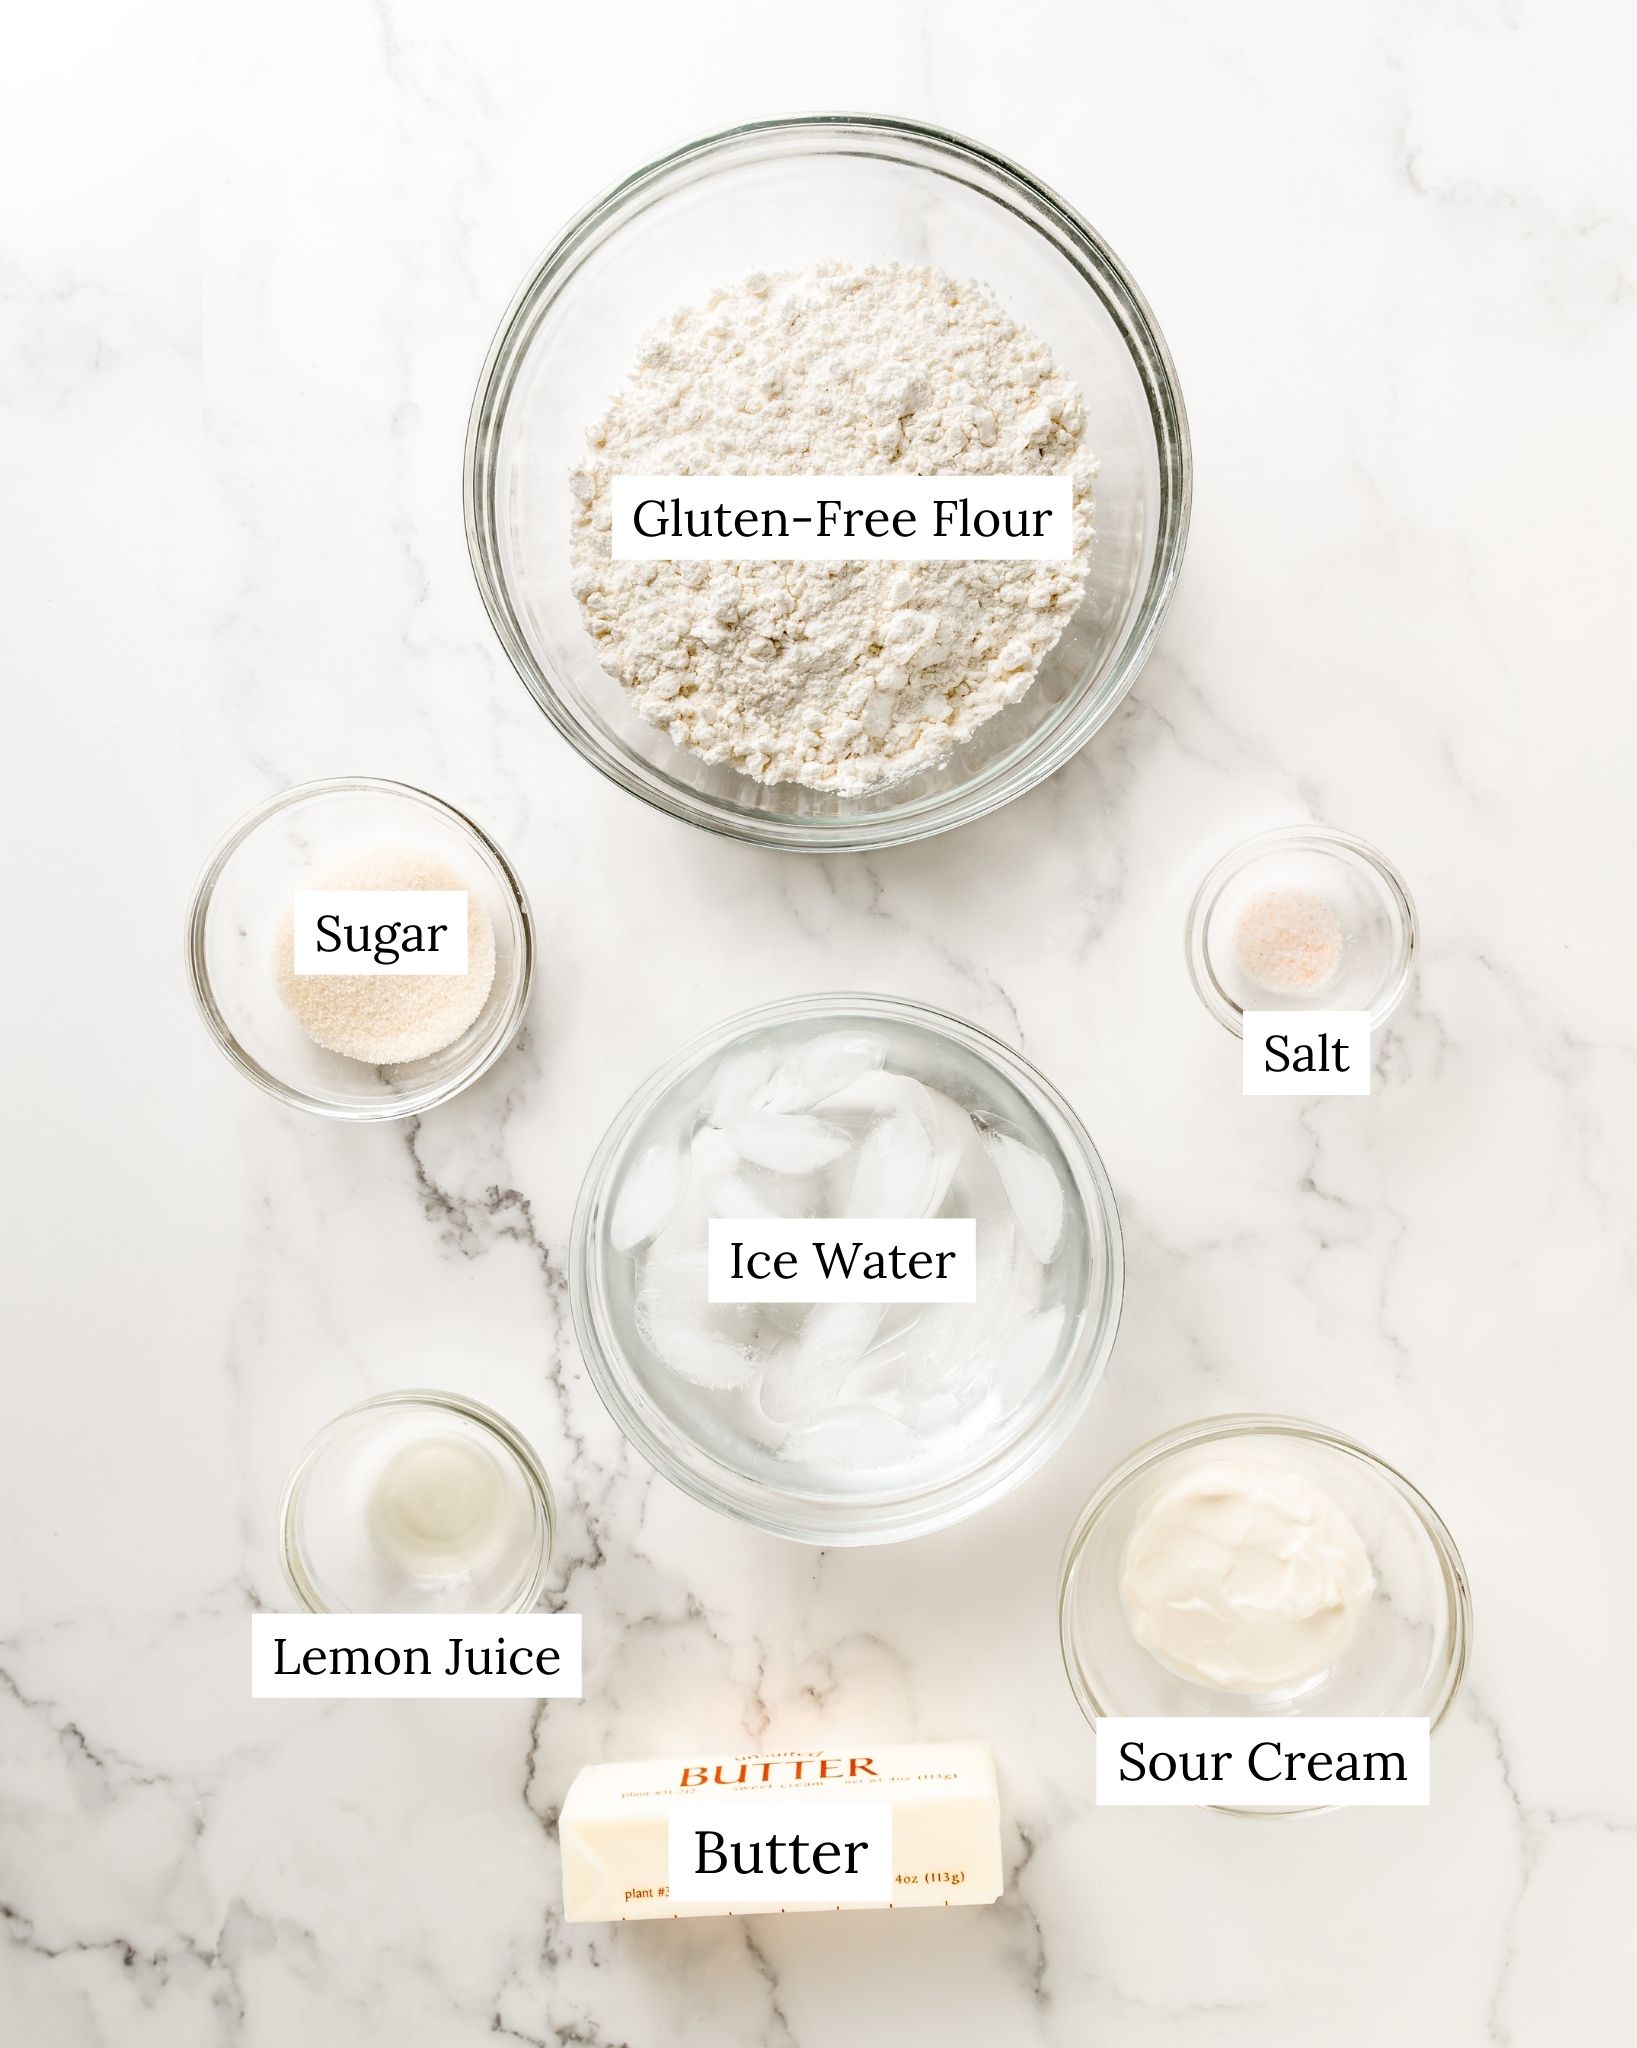
- Gluten-Free Flour: Cup 4 Cup gluten-free multi-purpose gluten-free flour gives the best flavor and texture for pie crust.
- Sugar: A little bit of sugar helps boost the flavor of the dough and aids in browning the crust.
- Salt: A pinch of salt helps balance the flavors.
- Butter: The key to an extra buttery flaky crust is to use really cold butter. We start by cutting the butter into small cubes and placing the cubes in the freezer for 15 minutes before making the dough.
- Sour Cream: Helps create tender flaky layers, and binds the dough making it easier to roll out.
- Lemon Juice: The lemon juice helps tenderize the dough. Apple cider vinegar also works too.
- Ice Cold Water: The key to properly hydrating the dough is to use the right amount of water. You want the dough to hold together but not be wet and sticky. Keeping the water ice cold is also to help keep the butter cold.
Instructions
Making the gluten-free pie dough
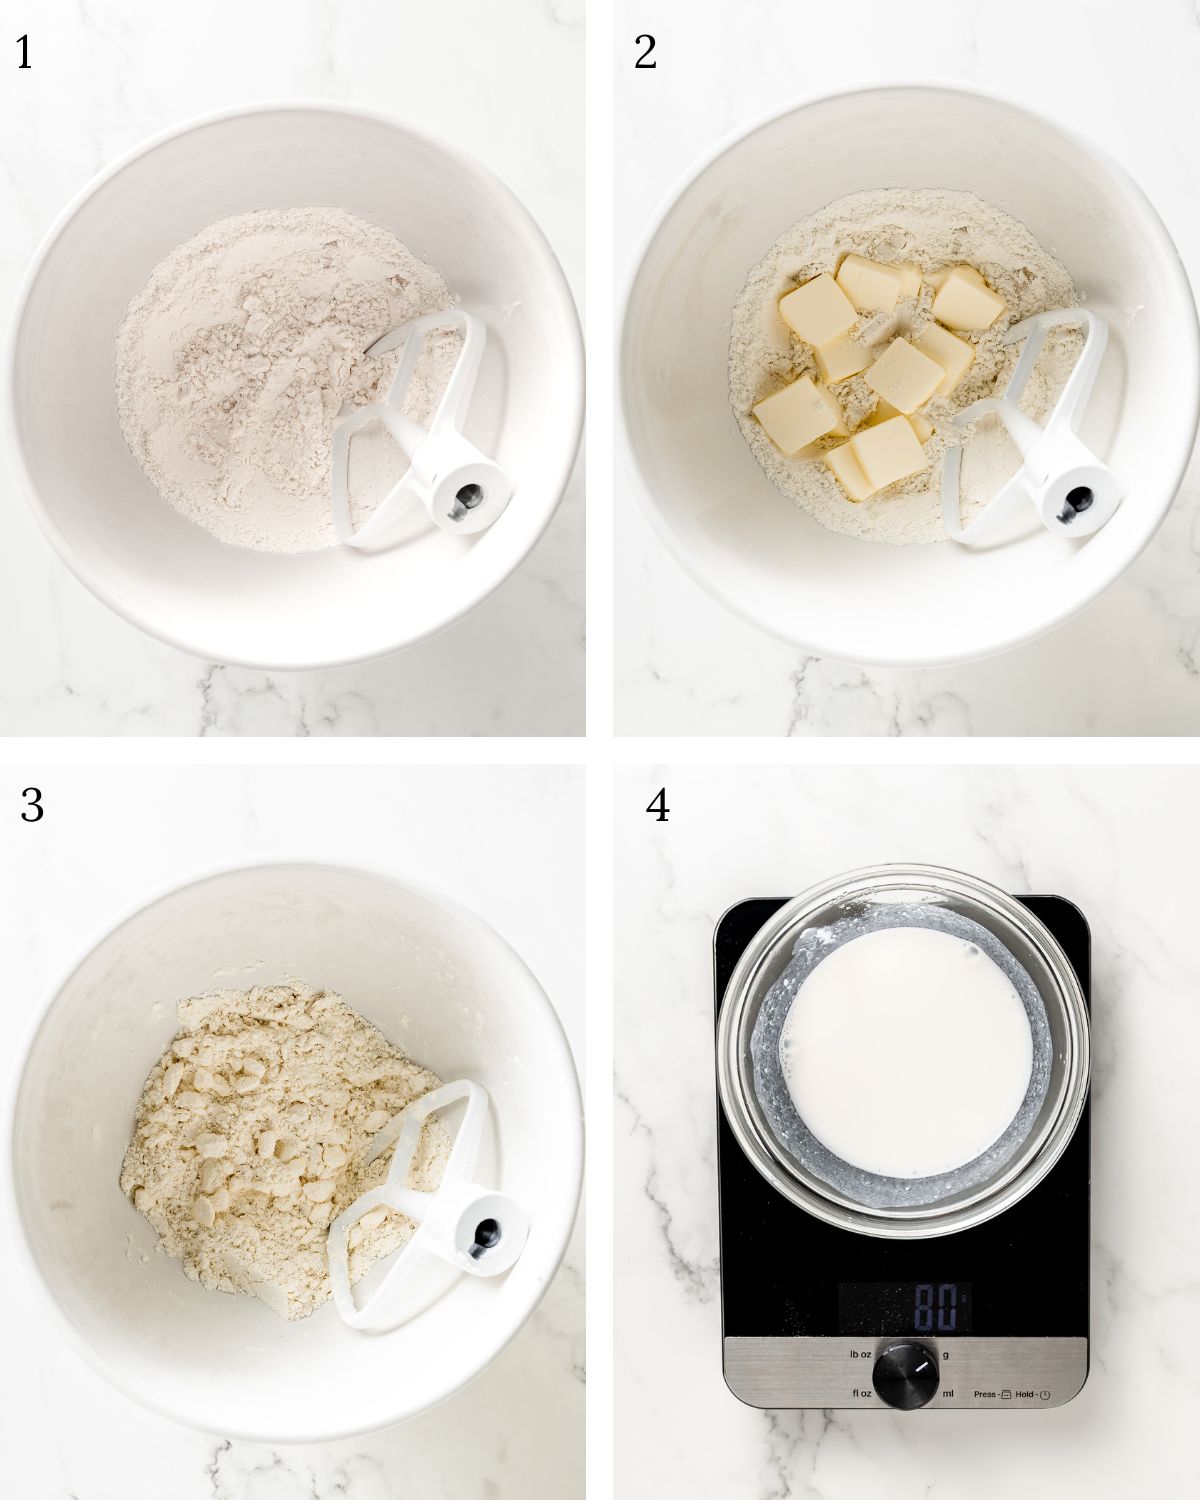
- Mix the dry ingredients. Add the gluten-free flour, sugar, and salt to a stand mixer with a paddle attachment. Turn the mixer on low speed and blend together the ingredients. Cube the butter, and place the cubes onto a small plate in the freezer for 15 minutes. Cold butter is key!
- Add the cold butter. Add the cubed butter to the flour mixture and toss to coat. This will create flaky layers. Turn the mixer on low speed and hold down the top with both hands, just until the butter starts to break down. (The paddle attachment may whip some of the flour out of the bowl while trying to break down the cold butter, so holding down the top helps avoid this problem.)
- Blend the butter into the flour mixture. After 1-2 minutes, use a spoon to sift through the mixture. You want the butter chunks no bigger than the size of walnuts. Anything larger you can quickly break apart with your hands but make sure to not handle the butter too much. Every piece of butter should be coated in flour.
- Combine the wet ingredients. Remove the sour cream, ice water, and lemon juice from the refrigerator. Add the ingredients to a small bowl measured on a food scale. Everything should weigh 80 grams. Whisk together until smooth, (it's ok if there are a few sour cream chunks).
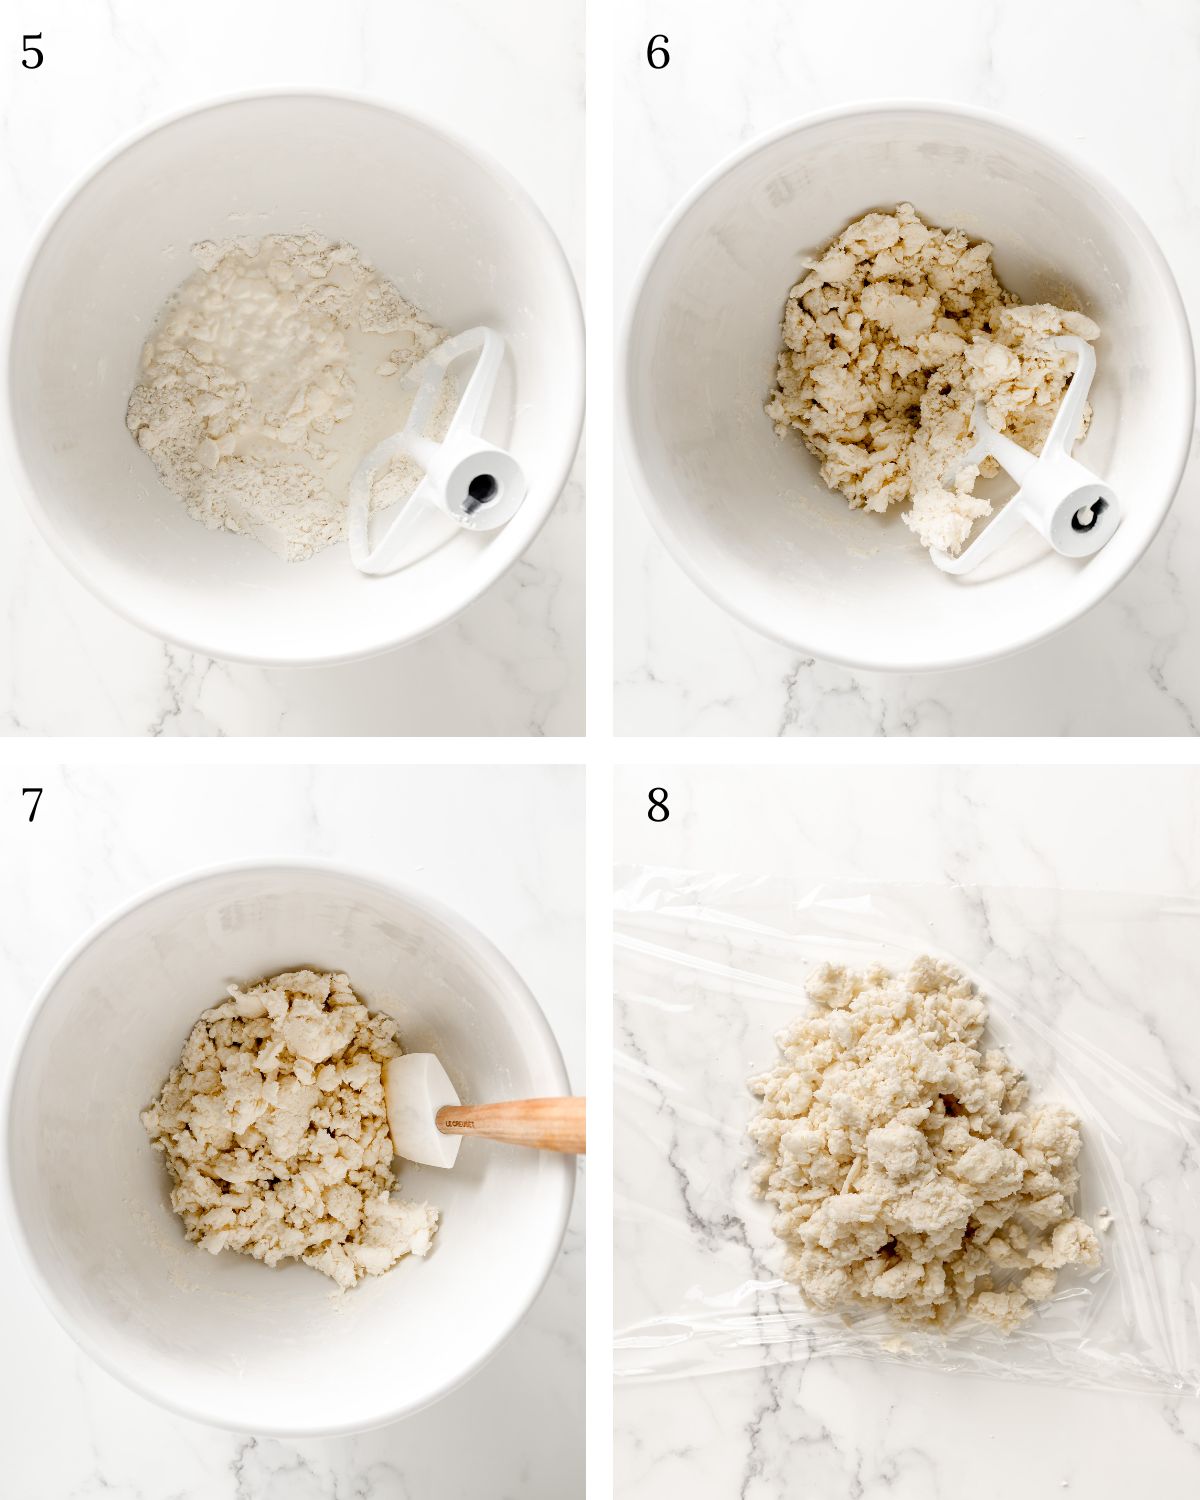
- Add the wet ingredients to the dry mixture. Pour the sour cream mixture into the bowl.
- Bring the dough together. Turn the mixer on back to low speed, until the dough begins to form. Form the dough. You do not want to overwork the dough, so as soon as the dough starts to collect around the paddle, turn off the mixer. The dough should be moistened, without visibly dry parts of flour. It should also not be overly wet or sticky. You should be able to squeeze the dough and have it hold together.
- Scrape down the bowl. Remove any excess dough from the paddle attachment, and scrape down the sides of the bowl with a rubber spatula.
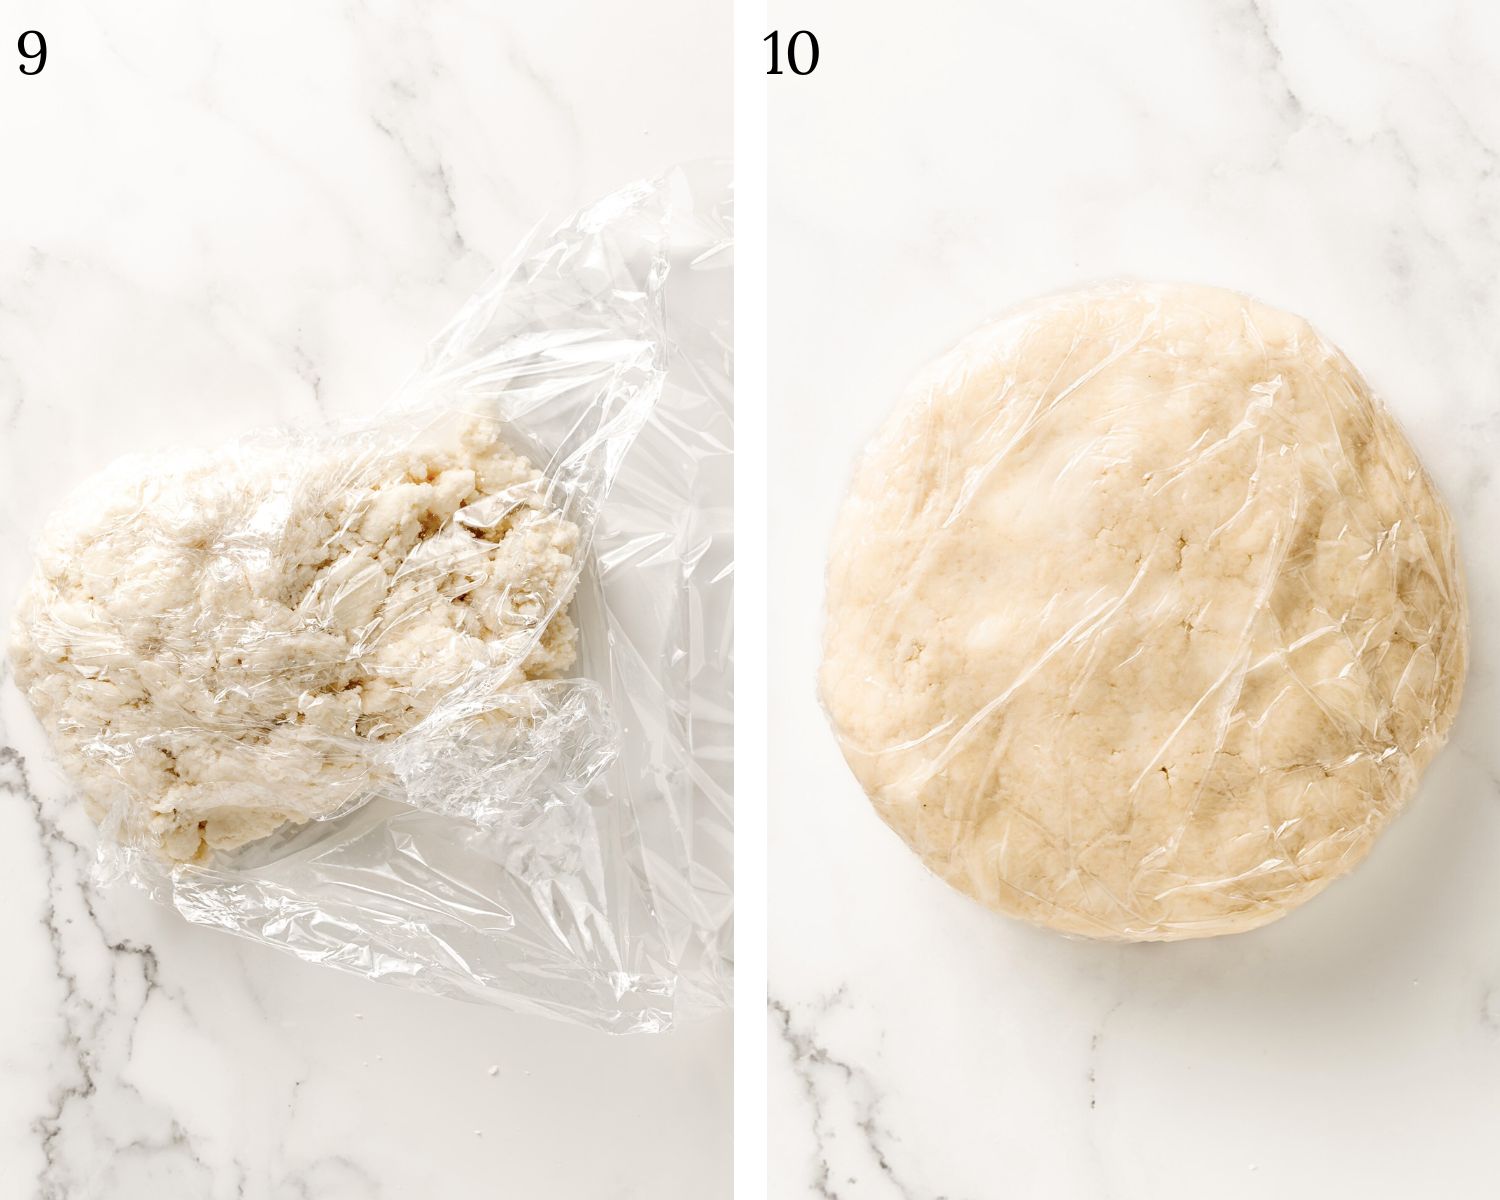
- Turn the dough out onto a piece of plastic wrap. Pour dough out onto a large piece of plastic wrap.
- Shape the dough. Use the plastic wrap to help gather the dough in a ball. Take one side of the plastic wrap and fold it over the dough, bunching the pieces together. Repeat on the opposite end, shaping the dough and smoothing it out into a disc.
- Chill the dough. Place the disc in the refrigerator for at least 30 minutes.
Rolling out the pie crust
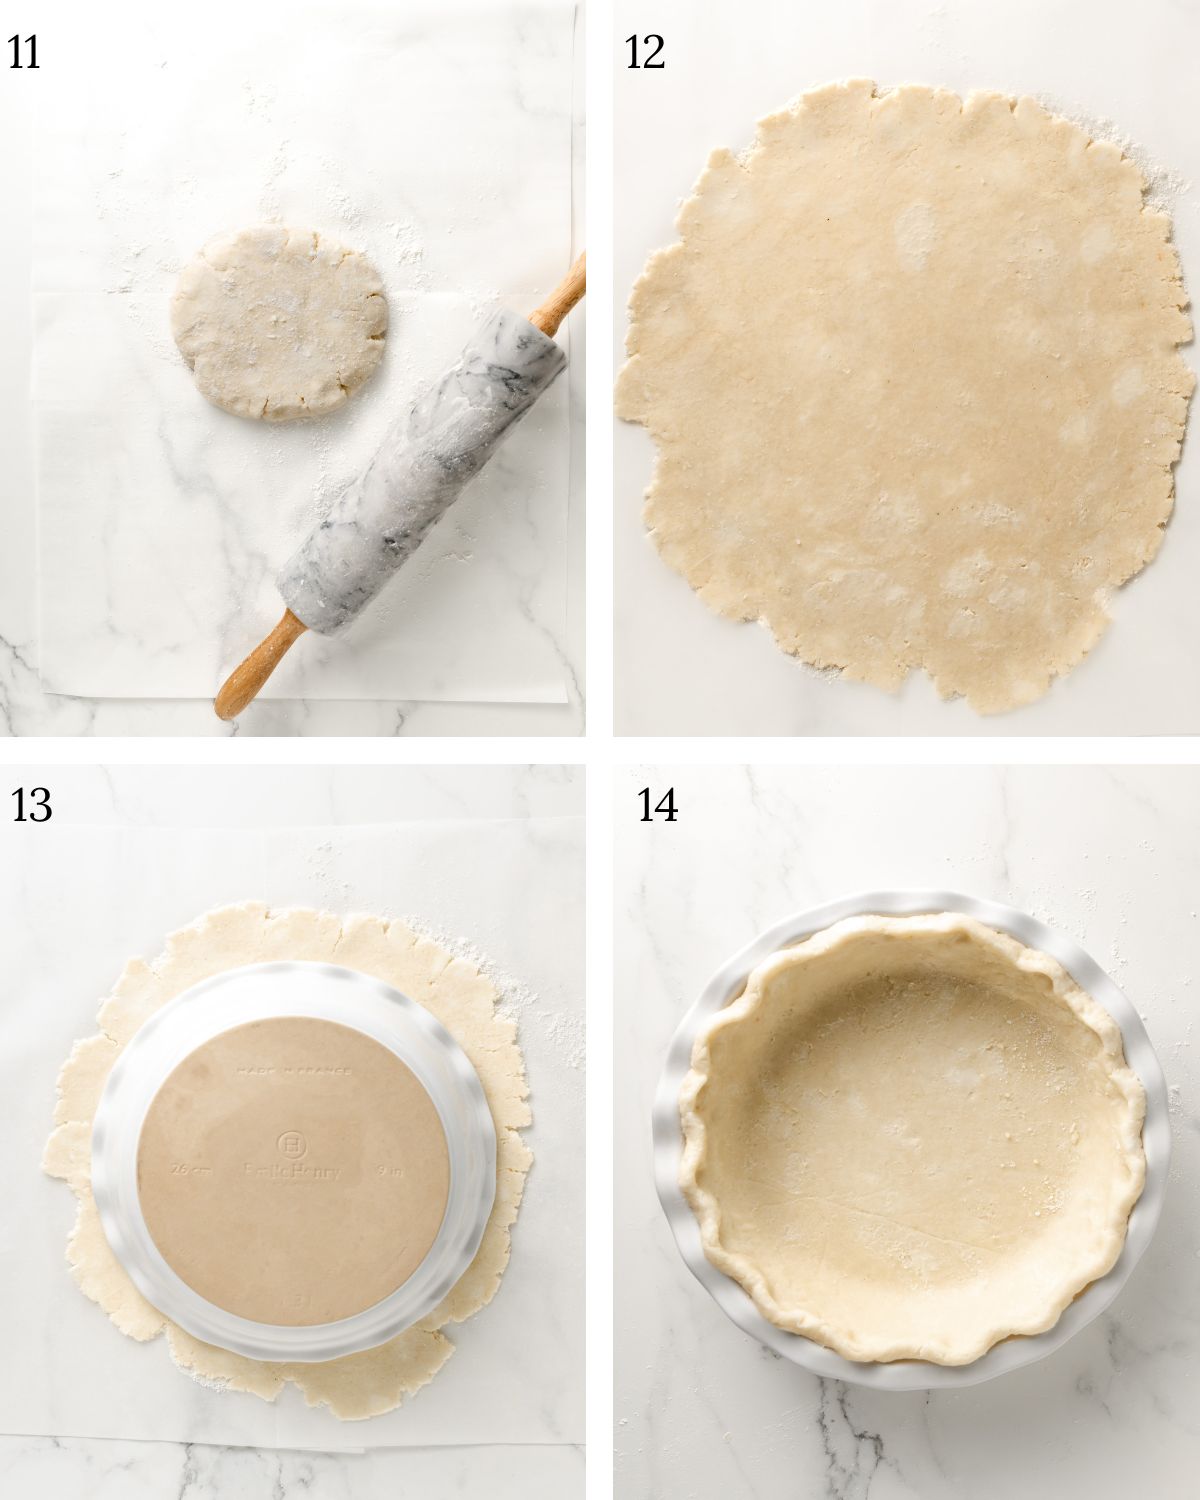
- Remove the dough from the refrigerator. If you refrigerate the dough longer than 1 hour, let the dough sit at room temperature for 15 minutes before rolling.
- Roll the pie crust. Place a piece of parchment paper on your work surface and sprinkle with flour as well as the rolling pin. Roll the dough until it is large enough to fit your pie plate at ¼ inch thickness.
- Transfer the dough to a pie plate. Place the pie plate on top of the dough, upside down, and carefully flip the pie dish over.
- Shape the pie crust. Gently remove the parchment paper and ease the dough into the bottom and sides of the pan, pushing out any air pockets. Trim any excess edges with scissors, leaving about a 1-inch overhang. Fold the edges of the crust under to be even with the top edge of the pie pan. Shape the edges as desired.
Par-baking & blind baking
Par-baking (partial baking) is similar to blind-baking (fully baking), but the baking time is reduced. Par-baking gives the pie crust a head start before adding the filling leading to a sturdier, flakier, no soggy bottom crust. A good example of using this method is for pumpkin pie. Blind baking is fully baking the pie crust. This method is used for pies such as coconut cream pie, chocolate cream pie, or lemon meringue that do not require baking.
To par-bake(partially bake):
- Line the pie and fill it with weights. Place crumbled parchment paper or aluminum foil on top of the crust and fill with pie weights or dried beans. Fill all the way up the sides of the crust. This stops the pastry base from rising during cooking.
- Bake. Preheat the oven to 425°F. Place the pie plate on a lined baking sheet, and bake on the lowest rack of the oven for 15 minutes. Remove the pie crust from the oven, and carefully lift and remove the aluminum foil with pie weights into a nearby bowl to cool.
- Apply egg wash (optional). To get a nice golden crispy crust, an egg wash is recommended. In a small bowl whisk together 1 egg and a splash of milk. Brush the edges and center of the pie crust with the egg wash for a golden crisp color.
- Docking the pie. Docking is a method used to help steam escape from the pie crust while baking. Using a fork, you'll prick small holes in the bottom and sides of the crust, without going too high on the sides. The only time you would not dock a pie crust is if you are putting a liquid filling in, such as pumpkin pie.
- Return the pie crust to the oven. Bake for an additional 8-12 minutes, or until the bottom of the crust is pale, dry, crisp, and flaky. Add a pie shield or line your crust with aluminum foil if it starts to brown too quickly If the crust puffs up out of the oven, feel free to gently push it down with the back of a knife.
- Let the crust cool. Once the crust has cooled, fill with crust with the pie filling and bake according to your recipe
To blind-bake (fully bake):
- Follow the steps above. Line the pie crust and bake with pie weights for 15 minutes. Remove the weights, and apply the egg wash. Dock the pie if needed.
- Return the pie crust to the oven. Bake the crust for an additional 15 minutes, or until the bottom and edges are browned and cooked through. Use a pie shield or line your crust with aluminum foil if it starts to brown too quickly.
- Let the crust cool. Fill with your choice of non-bake filling.
To bake a filled pie:
- No need to par-bake or blind-bake. Follow the steps up to chilling the pie crust in the freezer for 30 minutes, and then continue the recipe as instructed.
Pro Tips
- Weigh your ingredients on a food scale. For complete accuracy, I recommend weighing all of your ingredients on a food scale.
- Use the recommended flour. This recipe uses the gluten-free flour blend Cup 4 Cup multi-purpose gluten-free flour.
- Don’t over-mix the flour and butter. The larger chunks of butter equal a buttery flaky pie crust. Just make sure the chunks are no longer than the size of a walnut.
- Keep everything cold! Make sure to freeze the butter for 15 minutes, and keep the wet ingredients, such as the ice water, sour cream, and lemon juice in the refrigerator until ready to use.
- Refrigerate the dough. This will help hydrate the dough and keep the butter flecks cold in order to get flaky buttery layers. Chill the dough in the refrigerator for at least 30 minutes.
- Freeze the pie crust. Once you roll out the dough into the pie plate, you'll want to freeze the crust for at least 30 minutes to help rechill those strips of butter.
- Avoid sticking. Use parchment paper or plastic wrap to roll out the dough. I find it's much easier to transfer the dough to the plate.
- Use a pie shield. Watch the crust carefully when par-baking and blind baking. If it starts to catch too much color, use a pie shield to tent the sides and top of the crust or a pie shield.
- Use an egg wash. For a beautifully browned crust, brush the dough with an egg wash halfway through the bake.
- Baking times may vary. Every oven is different and the baking time for your crust may vary.
FAQ
Yes, the dough can be refrigerated for up to 2 days or frozen for up to 3 months. Just make sure to set the dough out for 15 minutes before rolling, if refrigerating longer than 1 hour. If freezing, thaw the dough in the refrigerator 24 hours before using.
To crimp the edge, form a V-shape with the thumb and index finger of your non-dominant hand on the outside edge of the pie crust. Then, use the knuckle of your index finger of your dominant hand to push the pastry into that V-shape. Move around the edge of the pie crust to create a fluted rim.
This recipe uses Cup 4 Cup multi-purpose gluten-free flour.
Recipe
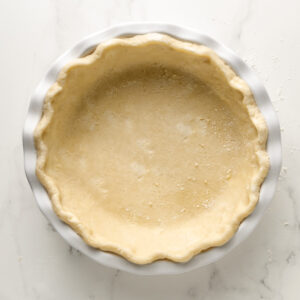
Extra Flaky Gluten-Free Pie Crust (Quick and Easy Recipe!)
Ingredients
- 1⅓ cup gluten-free flour, (180 grams), Cup 4 Cup multi-purpose gluten-free flour
- 1 tablespoons sugar (15 grams)
- ½ teaspoon salt
- 8 tablespoons cold butter, (113 grams), (cubed and placed in freezer for 15 minutes)
- 1 teaspoon fresh lemon juice or apple cider vinegar, (5 grams)
- 2 tablespoons sour cream, (30 grams)
- 3 tablespoons ice cold water, (45 grams)
Instructions
Making the dough
- Cold butter is key! Cube the butter, and place the cubes onto a small plate in the freezer for 15 minutes.
- Mix the dry ingredients. Add the gluten-free flour, sugar, and salt to a stand mixer with a paddle attachment. Turn the mixer on low speed and blend together the ingredients.
- Add the cold butter. Add the cubed butter to the flour mixture and toss to coat. This will create flaky layers. Turn the mixer on low speed and hold down the top with both hands, just until the butter starts to break down. (The paddle attachment may whip some of the flour out of the bowl while trying to break down the cold butter, so holding down the top helps avoid this problem.)
- Blend the butter into the flour mixture. After 1-2 minutes, use a spoon to sift through the mixture. You want the butter chunks no bigger than the size of walnuts. Anything larger you can quickly break apart with your hands but make sure to not handle the butter too much. Every piece of butter should be coated in flour
- Whisk together the wet ingredients. Remove the sour cream, ice water, and lemon juice from the refrigerator. Add the ingredients to a small bowl measured on a food scale. Everything should weigh 80 grams. Whisk together until smooth, (it's ok if there are a few sour cream chunks)
- Add the wet ingredients to the dry mixture. Pour the sour cream mixture into the bowl.
- Bring the dough together. Turn the mixer on back to low speed, until the dough begins to form. Form the dough. You do not want to overwork the dough, so as soon as the dough starts to collect around the paddle, turn off the mixer. The dough should be moistened, without visibly dry parts of flour. It should also not be overly wet or sticky. You should be able to squeeze the dough and have it hold together
- Scrape down the bowl. Remove any excess dough from the paddle attachment, and scrape down the sides of the bowl with a rubber spatula
- Turn the dough out onto a piece of plastic wrap. Pour dough out onto a large piece of plastic wrap
- Shape the dough. Use the plastic wrap to help gather the dough in a ball. Take one side of the plastic wrap and fold it over the dough, bunching the pieces together. Repeat on the opposite end, shaping the dough and smoothing it out into a disc.
- Chill the dough. Place the disc in the refrigerator for at least 30 minutes.
Rolling out the dough
- Remove the dough from the refrigerator. If you refrigerate the dough longer than 1 hour, let the dough sit at room temperature for 15 minutes before rolling.
- Roll the pie crust. Place a piece of parchment paper on your work surface and sprinkle with flour as well as the rolling pin. Roll the dough until it is large enough to fit your pie plate at ¼ inch thickness
- Transfer the dough to a pie plate. Place the pie plate on top of the dough, upside down, and carefully flip the pie dish over.
- Shape the pie crust. Gently remove the parchment paper and ease the dough into the bottom and sides of the pan, pushing out any air pockets. Trim any excess edges with scissors, leaving about a 1-inch overhang. Fold the edges of the crust under to be even with the top edge of the pie dish. Shape the edges as desired.
To par-bake(partially bake)
- Line the pie and fill it with weights. Place crumbled parchment paper or aluminum foil on top of the crust and fill with pie weights or dried beans. Fill all the way up the sides of the crust. This stops the pastry base from rising during cooking.
- Bake. Preheat the oven to 425°F. Place the pie plate on a lined baking sheet, and bake on the lowest rack of the oven for 15 minutes. Remove the pie crust from the oven, and carefully lift and remove the aluminum foil with pie weights into a nearby bowl to cool.
- Apply egg wash (optional). To get a nice golden crispy crust, adding an egg wash is recommended. In a small bowl whisk together 1 egg and a splash of milk. Brush the edges and center of the pie crust with the egg wash for a golden crisp color
- Docking the pie. Docking is a method used to help the steam escape from the pie crust while baking. Using a fork, prick small holes in the bottom and sides of the crust, without going too high on the sides. The only time you would not dock a pie crust is if you are putting a liquid filling in, such as pumpkin pie.
- Return the pie crust to the oven. Bake for an additional 8-12 minutes, or until the bottom of the crust is pale, dry, crisp, and flaky. Add a pie shield or line your crust with aluminum foil if it starts to brown too quickly. If the crust puffs up out of the oven, feel free to gently push it down with the back of a knife.
- Let the crust cool. Once the crust has cooled, fill with crust with the pie filling and bake according to your recipe.
To blind bake (fully bake):
- Follow the steps above. Line the pie crust and bake with pie weights for 15 minutes.
- Return the pie crust to the oven. Bake the crust for an additional 15 minutes, or until the bottom and edges are browned and cooked through. Use a pie shield or line your crust with aluminum foil if it starts to brown too quickly.
- Let the crust cool. Fill with your choice of non-bake filling.
To bake a filled pie
- Follow the steps up to chilling the pie crust in the freezer for 30 minutes, and then continue the recipe as instructed.
Notes
- Weigh your ingredients on a food scale. For complete accuracy, I recommend weighing all of your ingredients on a food scale.
- Use the recommended flour. This recipe uses the gluten-free flour blend Cup 4 Cup multi-purpose gluten-free flour.
- Don’t over-mix the flour and butter. The larger chunks of butter equal a buttery flaky pie crust. Just make sure the chunks are no longer than the size of a walnut.
- Keep everything cold! Make sure to freeze the butter for 15 minutes, and keep the wet ingredients, such as the ice water, sour cream, and lemon juice in the refrigerator until ready to use.
- Refrigerate the dough. This will help hydrate the dough and keep the butter flecks cold in order to get flaky buttery layers. Chill the dough in the refrigerator for at least 30 minutes.
- Freeze the pie crust. Once you roll out the dough into the pie plate, you'll want to freeze the crust for at least 30 minutes to help rechill those strips of butter.
- Avoid sticking. Use parchment paper or plastic wrap to roll out the dough. I find it's much easier to transfer the dough to the plate.
- Use a pie shield. Watch the crust carefully when par-baking and blind baking. If it starts to catch too much color, use a pie shield to tent the sides and top of the crust or a pie shield.
- Use an egg wash. For a beautifully browned crust, brush the dough with an egg wash halfway through the bake.
- Baking times may vary. Every oven is different and the baking time for your crust may vary.

Comments
No Comments