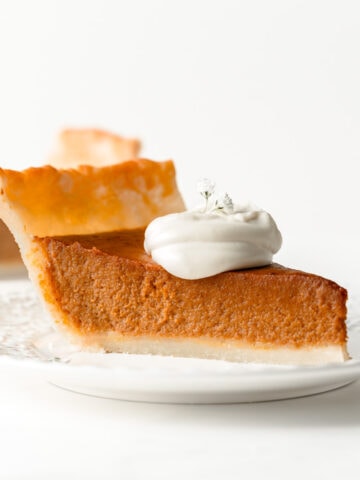
This gluten-free sweet potato pie is made with a homemade buttery flaky pie crust and a smooth and creamy brown butter sweet potato filling that will melt in your mouth. Topped with homemade marshmallow meringue, this southern dessert is a must-have on your Thanksgiving menu.

Why You Will Love This Gluten-Free Sweet Potato Pie Recipe
Fall in love with this irresistible gluten-free sweet potato pie. It has a light and creamy sweet potato filling, enhanced with brown butter, dark brown sugar, vanilla, and a hint of nutmeg. This pie sits in a flaky homemade gluten-free pie crust and is topped with a marshmallow meringue creme. It's a delicious Southern classic pie that you're going to want on your Thanksgiving table. Here are more reasons why you will love this gluten free sweet potato pie recipe:
- It's not pumpkin pie, it's sweet potato pie! When this recipe was in the initial stages I tried adding different spices, citrus, and even alcohol. But every recipe tasted more like a pumpkin pie, and while I love gluten-free pumpkin pie and make it every Thanksgiving, I wanted the sweet potatoes to come through in this recipe. Scaling back on the spices and keeping things simple was key.
- Simple ingredients yet flavorful. Browning the butter enhances the pie's flavor while the touch of nutmeg makes this a warm comforting dessert.
- Easy to make ahead. This sweet potato pie develops more flavor over time, which makes it a great option to make a day or two ahead during the holiday season.
Gluten-Free Sweet Potato Pie Ingredients

Ingredient Notes
- Sweet Potatoes: Look for fresh sweet potatoes without soft spots or bruising. Garnet sweet potatoes are my favorite.
- Unsalted Butter: The brown butter has a toasted, nutty, caramelized flavor that enhances the overall flavors of this recipe.
- Dark Brown Sugar: Pairs perfectly with the natural sweetness of sweet potatoes.
- Nutmeg: Ground nutmeg adds a warm nutty flavor with a hint of spice.
- Vanilla Extract: For best results, use a high-quality pure vanilla extract.
- Heavy Cream: Gives this pie a creamy smooth texture. You can also use canned full-fat coconut milk.
- Eggs: Give this pie structure, binding the custard pie filling.
- Vanilla Extract: Pure vanilla extract gives this pie the best flavor.
- Salt: Enhances the flavors.
- Pie Crust: You can make my homemade gluten-free pie crust or use your favorite gluten-free store-bought version.
Find the printable recipe card with full instructions and measurements below.
How To Make Gluten-Free Sweet Potato Pie
Prepare the filling and pie crust

- Step 1: Roast the sweet potatoes. Preheat the oven to 400º F. Scrub the sweet potatoes until clean, prick them 4 to 5 times with a fork. Place onto a parchment-lined baking sheet and bake for 1 hour until the sweet potatoes are tender. Allow the sweet potatoes to cool.
- Step 2: Par-bake the pie crust. Increase the oven temperature to 425º F and follow these instructions for par-baking. Once the gluten-free crust is baked, set it aside and lower the oven temperature to 350º F. If using a store-bought pie crust, follow the instructions on the package.
- Step 3. Purée sweet potatoes. Once the sweet potatoes are cool to the touch, peel and add them to a food processor. Purée until smooth. This may take 2-3 minutes depending on your equipment. Transfer 460 grams (about 2 cups worth) of sweet potato purée to a large mixing bowl or the bowl of a stand mixer.
- Step 4. Brown the butter. Add the butter to a large skillet and bring the skillet to medium heat. As the butter melts it will begin to foam and sizzle, whisk, and swirl the pan for even caramelization. The butter will go from a bright yellow to a deep golden brown color as the toasted milk solids at the bottom caramelize and emit a nutty aroma. Once the desired color is reached, turn off the heat. Pour the brown butter on top of the sweet potatoes.
Bake and chill the pie

- Step 5: Mix the filling. Add the dark brown sugar, vanilla extract, nutmeg, and salt to the large bowl. If using a stand mixture add the whisk attachment, otherwise, use a handheld electric mixer and mix until smooth. Pour in the heavy cream and the eggs, one at a time, and continue to mix until combined.
- Step 6: Add the filling to the pie shell. Pour the filling into the par-baked pie crust and place the pie dish on a large baking sheet.
- Step 7. Bake the pie. Place the baking sheet on the bottom rack of the oven and bake at 350º F for 40-50 minutes, or until the filling is just set. Add a pie shield halfway through the bake to the top of the crust if needed. When using my own pie crust recipe, my sweet potato pie was fully baked at 44 minutes. You'll know the pie is ready when the center is slightly jiggly when you give it a nudge. (Every oven is different, so I recommend checking to see if your pie is fully cooked at the 35-minute mark).
- Step 8. Chill the pie. Remove the pie from the oven and transfer it to a cooling rack for 2 hours. After two hours, place a piece of aluminum foil over the top of the pie and refrigerate the pie for at least 4 hours. Decorate with marshmallow creme right before serving.

Storage
- To Make in Advance: You can bake and chill this sweet potato pie two days in advance. Add the meringue right before serving, and it tends to become syrupy from the pie condensation.
- To Store: Leftovers can be stored in an airtight container, in the refrigerator, for up to 4 days.
Tips
Here are a few helpful tips for the perfect sweet potato pie!
- Bake with room temperature ingredients. Bring the eggs and heavy cream to room temperature before making the pie filling. Using room temperature ingredients can blend more easily, resulting in a smoother velvety sweet potato pie. More importantly, you want to maintain the liquid state of the brown butter, because if the brown butter starts to harden before baking, the pie will have a grainy texture.
- Taste test the filling before adding the eggs. Although I encourage you to try the recipe as is, you can taste-test the filling before adding the eggs and then decide if you want to add additional spices.
- Frozen store-bought crust versus homemade pie crust. I've tested this recipe using store-bought pie crusts and my homemade gluten-free pie crust. When adding the filling to a store-bought pie crust, the pie was fully baked around 36 minutes, therefore I recommended checking your pie for doneness at the 35-minute mark.
- Weigh the sweet potato puree. For best results, use a food scale to measure 460 grams of sweet potato purée for the recipe.

FAQ
Both are delicious desserts, but sweet potato pie is typically sweeter and lighter, while pumpkin pie is denser and heavier on spice.
To make this sweet potato pie filling dairy-free I recommend using 6 tablespoons of melted (not browned) vegan butter, such as Earth Balance, and dairy-free milk.
Roasting adds so much flavor, therefore I would not recommend boiling the sweet potatoes or using canned sweet potato puree.
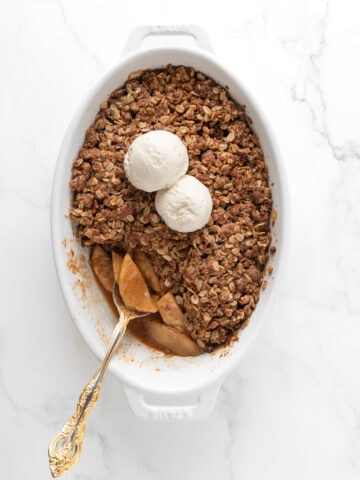
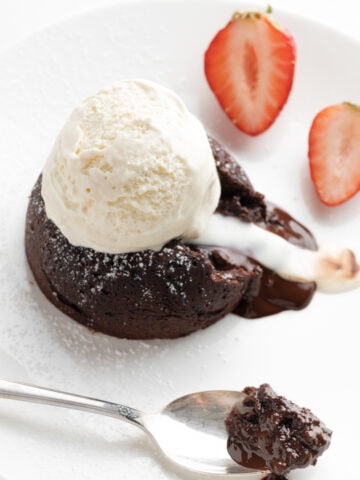
More Desserts You'll Love


I hope you love this gluten-free sweet potato pie recipe as much as I do! If you make it, I’d love to hear how it turned out in the comment box below. Your review will help other readers in the community.
Recipe

Gluten-Free Sweet Potato Pie With Marshmallow Creme
Ingredients
Gluten-Free Pie Crust
Sweet Potato Pie Filling
- 2 cups (460g) sweet potato puree, (about 3 medium-sized sweet potatoes)
- 8 tablespoons butter, browned
- ½ cup (100g) dark brown sugar
- ½ cup (120ml) heavy cream
- 2 large eggs
- 2 teaspoons vanilla extract
- ¾ teaspoon nutmeg
- ¼ teaspoon salt
Marshmallow Meringue Creme
- ½ recipe marshmallow meringue creme
Instructions
- Roast the sweet potatoes. Preheat the oven to 400º F. Scrub the sweet potatoes until clean, prick them 4 to 5 times with a fork. Place the potatoes onto a parchment-lined baking sheet and bake for 1 hour until tender. Allow the sweet potatoes to cool.
- Par-bake the pie crust. Increase the oven temperature to 425º F and follow these instructions for par-baking. Once the gluten-free crust is baked, set it aside and lower the oven temperature to 350º F. If using a store-bought pie crust, follow the instructions on the package.
- Purée sweet potatoes. Once the sweet potatoes are cool to the touch, peel and add them to a food processor. Purée until smooth. This may take 2-3 minutes, depending on your equipment. Transfer 460 grams (measured on a food scale) of sweet potato purée to a large mixing bowl or the bowl of a stand mixer.
- Brown the butter. Add the butter to a large skillet and bring the skillet to medium heat. As the butter melts, it will begin to foam and sizzle. Whisk and swirl the pan for even caramelization. The butter will go from a bright yellow to a deep golden brown as the toasted milk solids at the bottom caramelize and emit a nutty aroma. Once the desired color is reached, turn off the heat. Pour the brown butter on top of the sweet potato purée.
- Mix the filling. Add the dark brown sugar, vanilla extract, nutmeg, and salt to the bowl. If using a stand mixture add the whisk attachment, otherwise, use a handheld electric mixer and mix until smooth. Pour in the heavy cream and the eggs, one at a time, and continue to mix until combined.
- Add the filling to the pie shell. Pour the filling into the par-baked pie crust and place the pie dish on a large baking sheet.
- Bake the pie. Place the baking sheet on the bottom rack of the oven and bake at 350º F for 40-50 minutes, or until the filling is just set. Add a pie shield halfway through the bake if needed. My sweet potato pie was fully baked at 44 minutes. You'll know the pie is ready when the center is slightly jiggly when you give it a nudge. (Every oven is different, so I recommend checking to see if your pie is fully cooked at the 35-minute mark).
- Chill the pie. Remove the pie from the oven and transfer it to a cooling rack for 2 hours. After two hours, place a piece of aluminum foil over the top of the pie and refrigerate the pie for at least 4 hours. Decorate with marshmallow creme right before serving.


Wina says
This was absolutely delicious. This is my go to from here on out. Not sugary but the sweet potato comes out deliciously. My husband loved. I loved the taste of the brown butter and the dark brown sugar combined. Thank you
Rebecca Taig says
Wina,
I love to hear that you enjoyed this recipe, and I truly appreciate the time you took to make it and leave a review.
Have a great rest of your week.